Saturday, December 24, 2022

Full Bloom

Hi everyone.   Today is my final post for this year.  

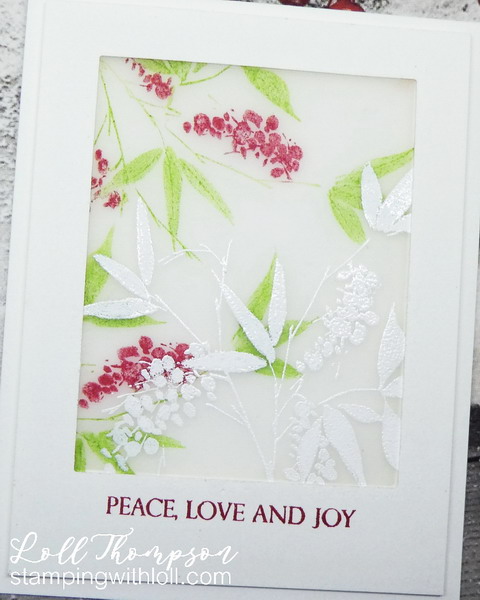
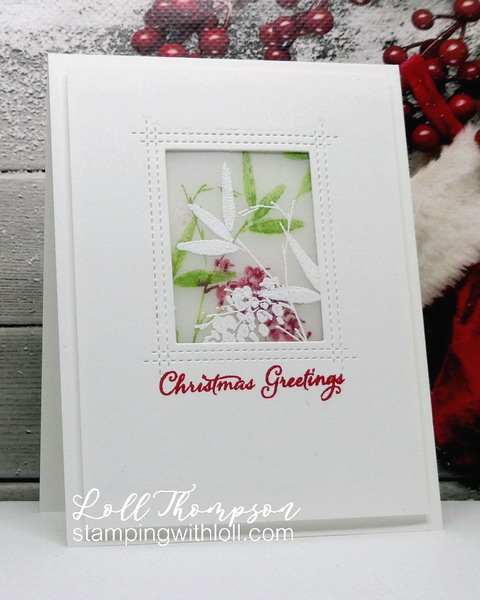
I am using my favourite technique that I learned this year from the very talented Chrissie Stokes.  I followed Chrissie's second video, using a single stamp to create my design, inked with Stampin' Up! markers.  The image is Full Bloom (Penny Black) and even though it's not technically a Christmas stamp, I think it works really well to make a Christmas card.  This is my most favourite Christmas card I've made this year and I sent it to a very dear friend. :)

To finish, I die-cut two rectangle frames, sandwiching them with the vellum.  I then added foam strips to the back to pop the framed piece up off the card base.  I stamped the sentiment (Christmas Sentiments from Penny Black) using the same red marker.

Stamping on both sides of the vellum gives the illusion the coloured leaves are recessed in the background.  It's such a creative and clever technique. :)

Close-up ...

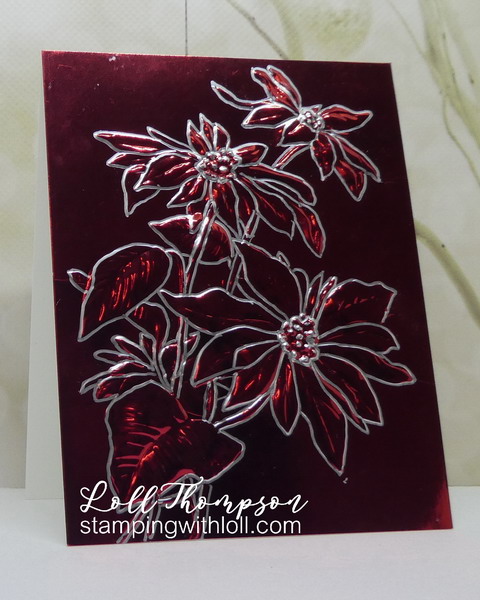
I made a quick second card using the same technique, image and inks ..
Thank you to all that visit my blog.  A special thank you to those that take the time to leave me messages of support.  I truly appreciate your visits.  Wishing you the most fabulous Christmas!

See you in 2023!

If you would like to subscribe by email,
please fill out the subscription form in the upper right sidebar.
Make sure to add "subscribe" to the message.
It is also important to add SWL1subscribers@gmail.com to your contact list
so Google recognizes the address and delivers the updates.

To unsubscribe, please use the same form making sure to add
"unsubscribe" to the message.
Thank you.


Stamps:  Full Bloom (Penny Black); Christmas Sentiments (Penny Black)
Paper:   White card stock (Neenah 110 lb.); Vellum (unknown)
Ink:   White Pigment ink (Hero Arts Unicorn); Markers in Real Red and Gumball Green (Stampin' Up!)
Accessories:  White embossing powder, heat tool, Rectangle dies - retired (Spellbinders)  

Challenges:

Tuesday, December 20, 2022

Merry Christmas!

Hi everyone.  I have this wonderful stamp that was gifted to me by my very good friend, Susan.  She loves dogs and has a beautiful English Spaniel, Tessa who she brings with her when we get together to stamp. :)  She gave me this stamp not long after we adopted Jessie.  I made two special Christmas cards using this sweet image ... one for Susan, and one for my dog walker, Emily. :)

I stamped the image onto tan mixed media paper using archival brown ink.  I used my Prismacolor pencils to colour the dogs before restamping overtop to add more depth of colour.  It took me a while to figure out the design for this card.  It all came together when I found some lovely Christmas paper in my stash using the same tan and red from the main image. :)

Second card with a slightly different layout ...
Thanks for stopping by!

If you would like to subscribe by email,
please fill out the subscription form in the upper right sidebar.
Make sure to add "subscribe" to the message.
It is also important to add SWL1subscribers@gmail.com to your contact list
so Google recognizes the address and delivers the updates.

To unsubscribe, please use the same form making sure to add
"unsubscribe" to the message.
Thank you.


Stamps:  King Charles Spaniel (Hunkydory); Merry Messages (Lawn Fawn
Paper:   White card stock (Neenah 110 lb.); Tan Mixed Media paper (Strathmore 140 lb.); "A Gingerbread Christmas" patterned paper (Echo Park)
Ink:   Potting Soil Archival ink (Ranger); DOX Candied Apple ink (Tim Holtz)
Accessories:   Prismacolor pencils (Arteza), 


Friday, December 16, 2022

Snowglobe

Hi everyone.  

I bought this Snow Globe die (Honey Bee) last year and only used it once to create a shaker card.  This time, I created a winter scene inside my snowglobe.  

I started by stamping Scenic Season - retired (Stampin' Up!).  I've had this stamp set for probably 20 years and never get tired of it. :)  I inked with Mowed Lawn distress ink on the trees and then used a sponge dauber to dab on some darker green (Rustic Wilderness).  I spritzed with water before stamping, then blotted the excess water and stamped again.  I added some Candied Apple distress ink for the bird and then sponged the sky with Broken China distress ink.

I tore some snowhills from my white card stock, adding glitter to the torn edges.  For the snow scene, I first splattered with white ink and then heat embossed Chunky White Frantage.  I sprinkled more glitter on top and reheated the Frantage to hold the glitter.  To finish, I added the frame from black card stock, heat embossing the sentiment in white and lined with acetate.

Thanks for stopping by!


If you would like to subscribe by email,
please fill out the subscription form in the upper right sidebar.
Make sure to add "subscribe" to the message.
It is also important to add sw1subscribers@gmail.com to your contact list
so Google recognizes the address and delivers the updates.

To unsubscribe, please use the same form making sure to add
"unsubscribe" to the message.
Thank you.


Stamps:  Scenic Season - retired (Stampin' Up!)
Paper:   White card stock (Neenah 110 lb.); Mixed Media paper (Strathmore 140 lb.); Black card stock (SU!)
Ink:  Distress Inks:  Mowed Lawn, Rustic Wilderness, Candied Apple, Broken China (Tim Holtz); White Pigment ink 
Accessories:   Snow Globe die (Honey Bee), water mister, sponge brush, white acrylic paint, splatter brush, Chunky White Frantage (Stampendous), glitter (SU!), white embossing powder (Ranger), heat tool


Monday, December 12, 2022

Stenciled Snowflakes

Hi everyone.  A quick and simple card using a wonderful snowflake stencil (Memory Box - retired).  I attached it to my white card stock and sponged over top with Salvaged Patina distress ink.  I made it darker at the top and lighter as I went down the page, fading out to white (ombre technique).  I cut the panel to size and added two torn snow hills from white card stock, layered at the bottom.

I used a sweet deer die (Deer Trio from Impression Obsession), cut from kraft card stock, with added details for the eyes and hoofs and sponging around the outside of the die-cut.  To finish, I popped up the deer over the background and then popped the whole panel on top of my card base.  The sentiment (Snowglobe Sayings - retired from My Favorite Things) is stamped in Gathered Twigs distress ink.

I'm sending this card over to the Peace on Earth Challenge #29.  LOVE the mood board and used the top right photo as my inspiration for my card. :)

I'm also playing along with the Stencil Fun December challenge.  It's Stenciling - Anything Goes each month with optional twist (December - Holiday).   :)

Thanks for stopping by!


If you would like to subscribe by email,
please fill out the subscription form in the upper right sidebar.
Make sure to add "subscribe" to the message.
It is also important to add SWL1subscribers@gmail.com to your contact list
so Google recognizes the address and delivers the updates.

To unsubscribe, please use the same form making sure to add
"unsubscribe" to the message.
Thank you.


Stamps:  Snowglobe Sayings - retired (My Favorite Things)
Paper:   White card stock (Neenah 110 lb.)
Ink:   Distress Inks:  Salvaged Patina, Gathered Twigs (Tim Holtz)
Accessories:   Winter Snowflake Lace stencil - retired (Memory Box), sponge, Deer Trio die (Impression Obsession), fine black permanent marker

Challenges:
Peace on Earth Challenge #29


Friday, December 09, 2022

Poinsettia Embossing Folder

Hi everyone.  I've had a play with the Tim Holtz 3D Poinsettia Embossing Folder ... this time embossing on red foil card stock.  I love the look of the elegant foil but the flowers did seem to get lost.  I used a silver pilot pen (permanent ink) to outline the embossed images and it made a huge difference. :)

I adhered my card front onto a card base and stamped the sentiment in silver on the inside of the card.

* * * * *
I decided to make another ... this time the embossing got crinkled on the outside edges, so I trimmed down my panel before outlining the same as above.  Then adhered my card front to my card base, and stamping the sentiment on the inside.

Two very quick and easy cards. :)

Thanks for stopping by!


If you would like to subscribe by email,
please fill out the subscription form in the upper right sidebar.
Make sure to add "subscribe" to the message.
It is also important to add SWL1subscribers@gmail.com to your contact list
so Google recognizes the address and delivers the updates.

To unsubscribe, please use the same form making sure to add
"unsubscribe" to the message.
Thank you.


Paper:   White card stock (Neenah 110 lb.); Red Foil card stock (Tonic)
Accessories:  3D Poinsettia embossing folder (Tim Holtz); Silver ink pen (Pilot) 


Monday, December 05, 2022

Peace, Love and Joy

Hi everyone.  

I'm happy to say that I have my Christmas cards done and mailed. :)  I'm sharing one that I made a short while ago using two beautiful holly stamps from Penny Black (Brillance).  I used the marker watercolour spritz technique, using SU!'s markers this time in Always Artichoke and Cherry Cobbler.  I found the SU! ink gives a more watercoloured, rustic look from using distress inks.

I added one colour at a time to the two sprigs of holly, lightly spritzed with water and then stamped onto a piece of mixed media paper.  I used a small brush to move some of the wet ink around until I was happy with the look. 

Once dry, I stamped the sentiment (Christmas Sentiments - Penny Black) in more of the cherry cobbler ink.  To finish, I used my white acrylic pen to add some highlights to the berries.

Close-up ...
I'm sending this card to the Penny Black Saturday December Challenge.
Thanks for stopping by!


If you would like to subscribe by email,
please fill out the subscription form in the upper right sidebar.
Make sure to add "subscribe" to the message.
It is also important to add SWL1subscribers@gmail.com to your contact list
so Google recognizes the address and delivers the updates.

To unsubscribe, please use the same form making sure to add
"unsubscribe" to the message.
Thank you.


Stamps:  Brillance (Penny Black); Christmas Sentiments (Penny Black)
Paper:   White card stock (Neenah 110 lb.); Mixed Media paper (Strathmore 140 lb.)
Ink:   SU! markers:  Always Artichoke, Cherry Cobbler
Accessories:   fine water mister, small w/c paint brush, white acrylic pen (Posca)

Challenges:

Friday, December 02, 2022

Letterpress Snowflake

Hi everyone.   Our Zoom crafty group met earlier this week and we tried Chrissie Stoke's Easy Letterpress technique (click on link to view video).

We had varying degrees of success.  One of the biggest problems was figuring out the right "sandwich" to use in our die-cutting machines (we all have different ones).  Using a magnet in the sandwich to keep your inked die from moving also helped a lot. 

Once I did a few tries, I did figure it out, but can't remember what it as now. :)  It did a lovely emboss of my large snowflake die and added colour to the background.  I added a white die-cut snowflake on top to complete.  This technique is limited as the dies need to be symmetrical in order to use both the back and front of the dies (you'll see in the video).

In the photo above, you can see the raised design from embossing the die.  It does add some wonderful texture and dimension. :)

This is the first time I used my new Sophie Snowflake die from Simon Says Stamp, so I'm sending this card over to NBUS Challenge #45.


Thanks for stopping by!

If you would like to subscribe by email,
please fill out the subscription form in the upper right sidebar.
Make sure to add "subscribe" to the message.
It is also important to add SWL1subscribers@gmail.com to your contact list
so Google recognizes the address and delivers the updates.

To unsubscribe, please use the same form making sure to add
"unsubscribe" to the message.
Thank you.


Stamps:  Holiday Sprigs - sentiment (Simon Says Stamp)
Paper:   White card stock (Neenah 110 lb.); Mixed Media paper (Strathmore 140 lb.)
Ink:   Salty Ocean distress ink (Tim Holtz)
Accessories:   Sophie Snowflake die (Simon Says Stamp)

Challenges: