Monday, February 28, 2022

Adding White Elements

Hi everyone.   Today I'm sharing that my focus will be changing as we deal with a serious illness in our family.

At the same time, making cards brings me joy and is very therapeutic for me, so I will continue to create cards when I have time / energy.  I may not be posting as much, but I will still be posting.  I have hit pause on my two challenges (CAS Mix Up and CAS Christmas) for a while.

On to today's card ...

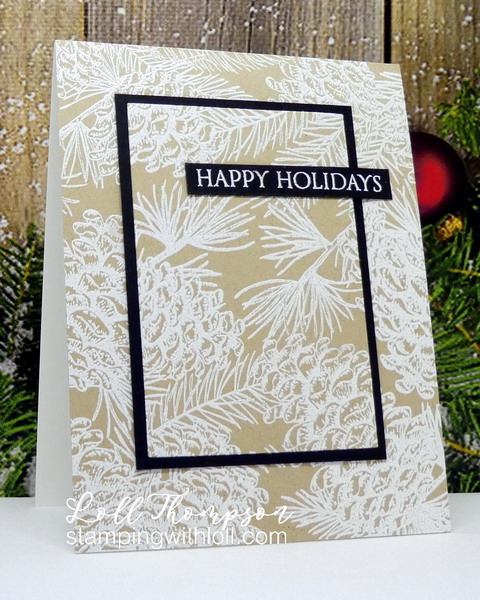
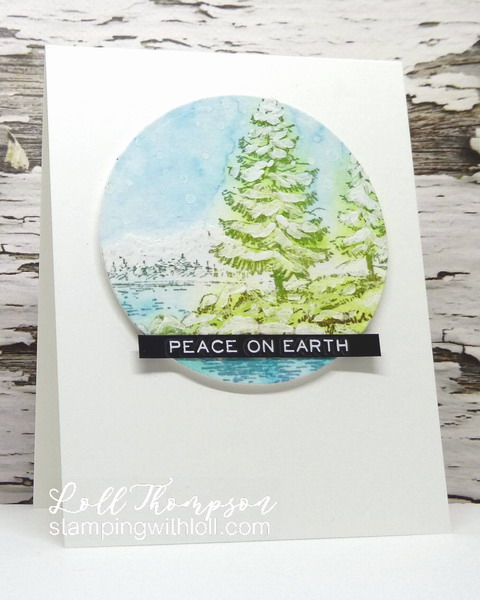
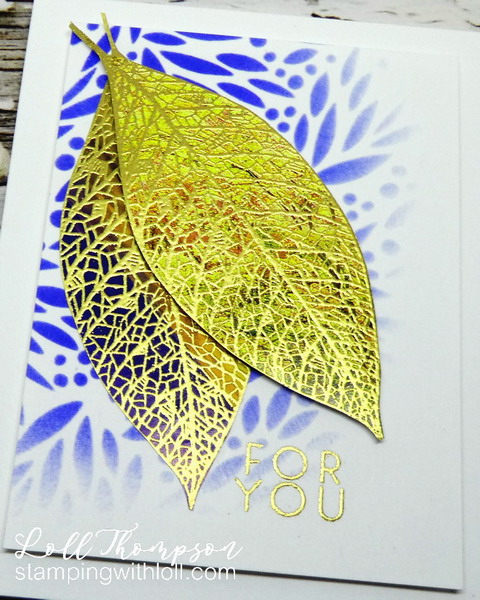
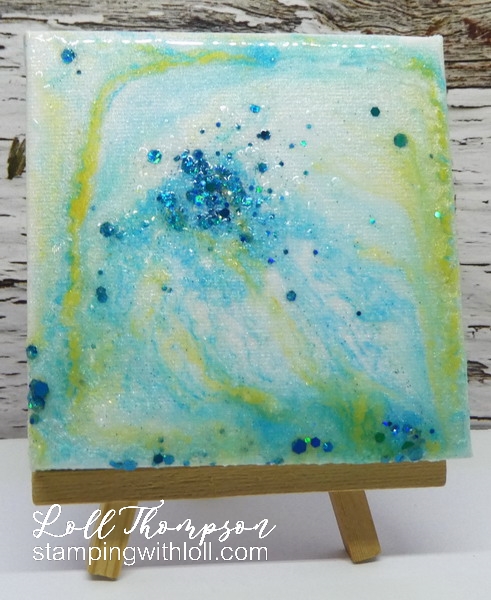
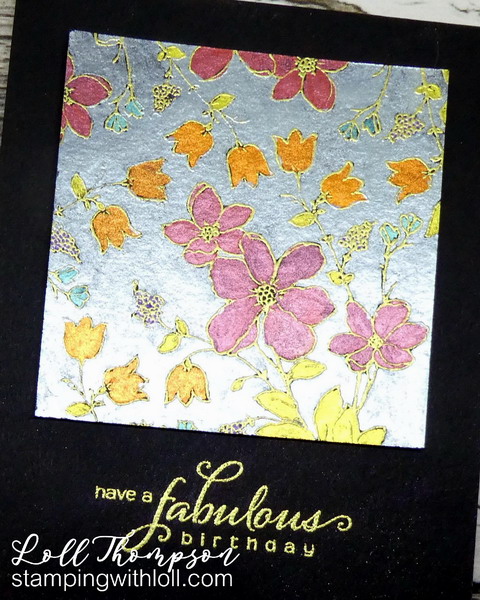
Here is a technique that I tried following the video by Altenew (Magic Effects with Water) ... with this particular technique starting at 6:55 of the video.

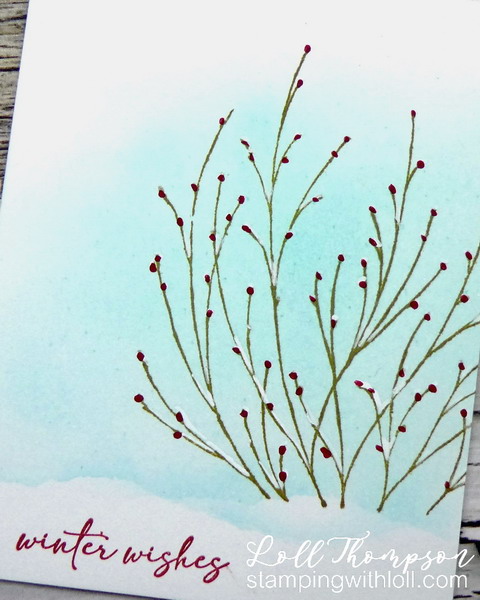
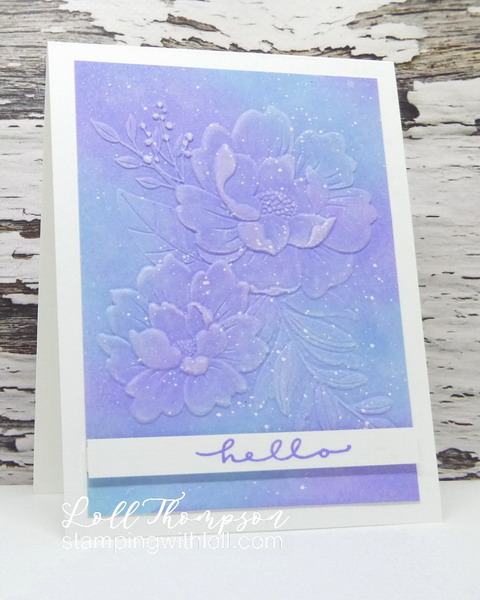
Basics are to sponge DOX inks (Tumbled Glass and Shaded Lilac used above) to cover a card front, place the panel into a 3-D embossing folder (Peony Bundle - Simon Says Stamp used above) after spritzing water (I used shimmer spray) over the deep embossed inside, and then running it through your embossing machine. Once dry, I lightly swiped my white pigment ink pad over the embossing to highlight the raised areas.  I wish I could have gotten more white ink on the raised design, but if I pressed harder, the white would also show on the background (guess how I know this!). :)

I finished by splattering the front with diluted white acrylic paint and then adding a white sentiment banner with hello sentiment (Happy Messages - Stampendous), stamped in Shaded Lilac DOX ink.

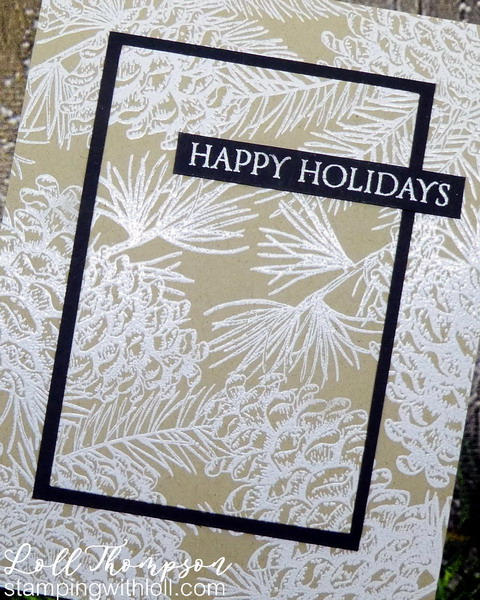
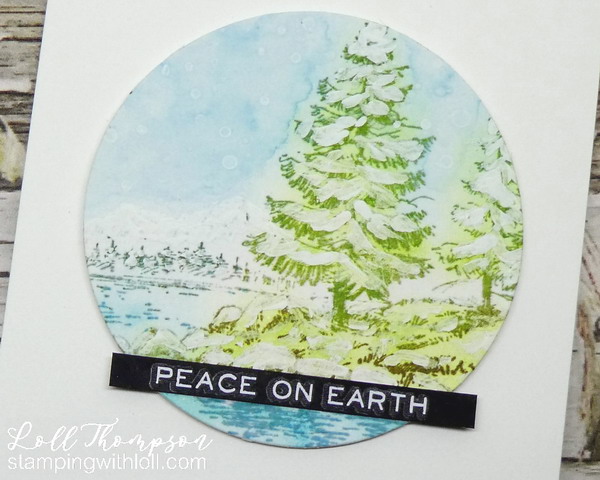
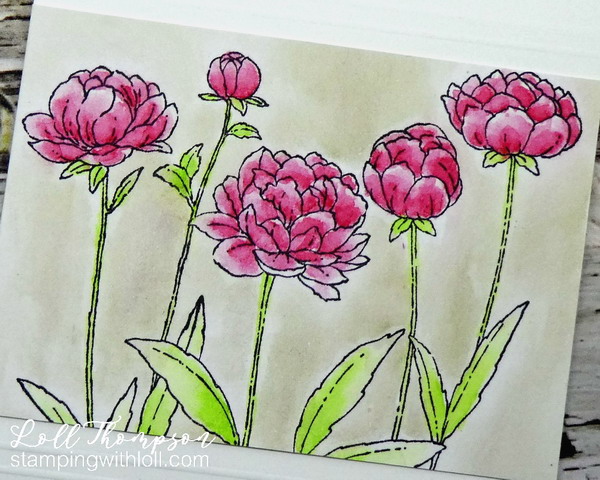
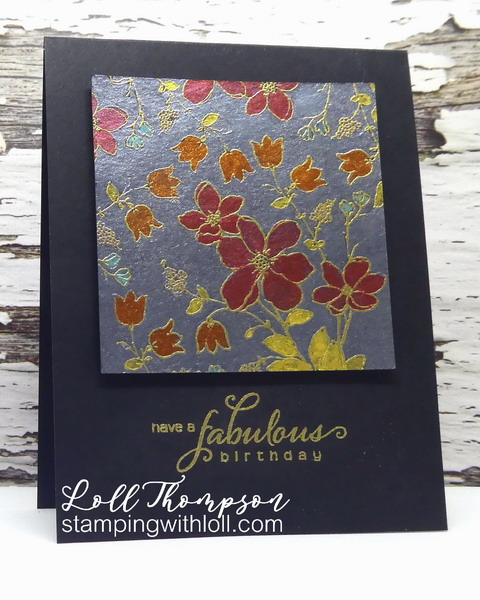
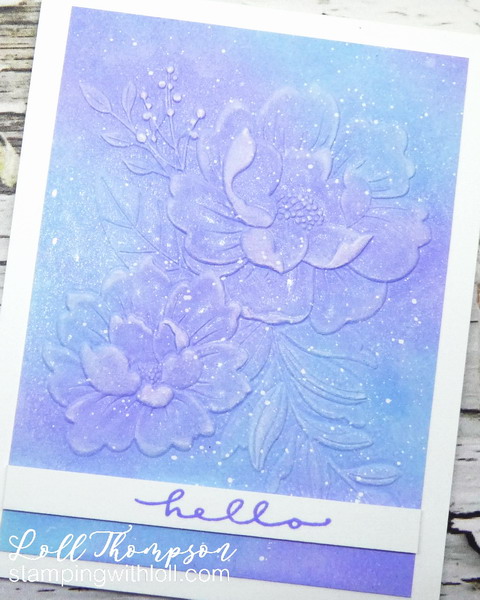
Close-up ... this shows a bit of the sparkle from the shimmer spray. 

Thanks for coming by for a visit!


If you would like to subscribe by email,
please fill out the subscription form in the upper right sidebar.
Make sure to add "subscribe" to the message.
It is also important to add sw1subscribers@gmail.com to your contact list
so Google recognizes the address and delivers the updates.

To unsubscribe, please use the same form on the right sidebar, making sure to add
"unsubscribe" to the message.
Thank you.


Stamps:  Happy Messages (Stampendous)
Paper:   White card stock (Neenah 110 lb.); Mixed Media paper (Strathmore 140 lb.)
Ink:   Distress Oxide Inks:  Shaded Lilac, Tumbled Glass (Tim Holtz); Unicorn White Pigment ink (Hero Arts)
Accessories:   Peony Bundle 3-D Embossing Folder (Simon Says Stamp); sponges, shimmer spray


Friday, February 25, 2022

Kraft Christmas

Hi everyone.  I used a NBUS (never-before-used-schtuff) stamp ... this gorgeous Pinecone Background (Simon Says Stamp).  Inked it with white pigment ink, stamped onto kraft card stock; then sprinkled with white embossing powder and heated until melted.

Used a different design for me (not CAS ).  Cut out a thin frame in the center (Thin Frames Wafer Dies - Simon Says Stamp), replaced it with a piece of black card stock slightly larger than the center panel, popped it up on foam and adhered to my card base.  Added a simple white heat embossed sentiment (Banner Sentiments - Penny Black) on black card stock.

Close-up ...

I'm sending this to a few challenges:


And ... NBUS Challenge #35 ... first inking for the pinecone background stamp!


Thanks for stopping by!


If you would like to subscribe by email,
please fill out the subscription form in the upper right sidebar.
It is also important to add sw1subscribers@gmail.com to your contact list
so Google recognizes the address and delivers the updates.

To unsubscribe, please use the same form on the right sidebar, making sure to add
"unsubscribe" to the message.
Thank you.


Stamps:  Pinecone Background (Simon Says Stamp)
Paper:   White card stock (Neenah 110 lb.); Kraft card stock (Carta Bella); Black card stock (SU!)
Ink:   White Pigment (Hero Arts)
Accessories:   White embossing powder (Ranger), heat tool, Thin Frames Wafer Dies (Simon Says Stamp)

Challenges:
February Rudolph Days - Anything Christmas Goes


Saturday, February 19, 2022

February PBSC Reminder card

Hi everyone.  I'm Guest Designing for Penny Black Saturday Challenge (Love is in the Air or Anything Penny Black goes this month.  So fun playing with my new Penny Black stamps!  Thanks to Helen and team for letting me join them this month!
I stamped my sweet kitty and envelope image (Love Everywhere) onto mixed media panel using black ink and then heat embossed in clear.  I used the matching die (Love Everywhere Cut Out) to die-cut the image before watercolouring with distress inks (Candied Apple, Wilted Violet, Black Soot).  I added white polka-dots to the envelope using my white Posca pen, winked the heart with clear sparkle, and finally added crystal glaze over the heart.  I used a thin piece of foam on the back to pop the kitty-filled envelope over top of a bokeh background (made by sponging different sizes of circles with red, purple, and white ink, some over top of each other, to create this fun background.

This sweet kitty tugs at my heart strings.  :)  

Close-up ...

Please check out the challenge blog to see the beautiful reminder cards from the Designers.  And if you haven't played along yet, please come join in the fun!!


Penny Black Products


If you would like to subscribe by email,
please fill out the subscription form in the upper right sidebar.
It is also important to add sw1subscribers@gmail.com to your contact list
so Google recognizes the address and delivers the updates.

To unsubscribe, please use the same form on the right sidebar, making sure to add
"unsubscribe" to the message.
Thank you.


Stamps:  Love Everywhere (Penny Black)
Paper:   White card stock (Neenah 110 lb.); Mixed Media paper (Strathmore 140 lb.)
Ink:   Black (Memento); Distress Inks:  Candied Apple, Wilted Violet, Black Soot (Tim Holtz); White pigment ink (Hero Arts)
Accessories:   Clear embossing powder (Ranger), heat tool, paint brushes, White Posca pen, Red Chalk, Clear Wink of Stella, Crystal Glaze (Nuvo), DIY circle stencil make from acetate sheet and circle punches, sponges, 

Challenges:
Penny Black Saturday Challenge - Love is in the Air or Anything Goes


Thursday, February 17, 2022

February CAS Christmas Reminder

Hi everyone.  Time for the reminder for this month's CAS Christmas challenge, hosted by Christine.


I used a new-to-me stamp, Winter Waters Edge (Nellie's Choice) for my card.  Stamped first in shadow grey Archival ink and then used my new-to-me set of Archival inks to add colour over top.  I just dabbed with the corner of my ink pad to get the colours where I wanted them.  I love that I can add white acrylic paint over top and none of the inks will bleed into the white. :)

After adding colour to the trees, mountains, water, grass and stones, I used more of the same inks and a tiny blending sponge to fill in some of the areas.  For the sky, it was too big to get a consistent cover with archival ink, so used salty ocean distress ink.  Used white acrylic paint to add snow pretty much everywhere, using loose strokes.  I added white dots of acrylic paint for snow falling (using the end of my brush), but found it too controlled in keeping with the rest of the image.  I used a wet brush over the sky to soften the "snowflakes" ... happy with how it turned out.  I had to really let go of my control issues for this one! :)

Close-up ... you can see lots of detail with this photo... loose strokes.  :)

I thought I would save myself some time and use one of the Christmas Remnant Rubs from Tim Holtz.  I think I may have had them too long because I had a heck of a time getting the sentiment to stick to the black banner.  And you can see a slight outline.  Not thrilled, but it's there and I'm going with it. :)

I hope you'll check out the February CAS Christmas post and see the beautiful reinder cards from our Designers.  If you haven't played along yet, there's still a week to go.  Making Christmas cards throughout the year takes a lot of pressure off when Christmas gets close.


If you would like to subscribe by email,
please fill out the subscription form in the upper right sidebar.
It is also important to add sw1subscribers@gmail.com to your contact list
so Google recognizes the address and delivers the updates.

To unsubscribe, please use the same form on the right sidebar, making sure to add
"unsubscribe" to the message.
Thank you.


Stamps:  Winter Waters Edge (Nellie's Choise)
Paper:   White card stock (Neenah 110 lb.); Mixed Media paper (Strathmore 140 lb.); Black card stock (SU!)
Ink:   Archival Inks - Minis (Ranger);  Salty Ocean distress ink (Tim Holtz)
Accessories:   sponges, paint brushes, white acrylic paint, Remnant Rubs (Tim Holtz)

Challenges:
CAS Christmas February Reminder - Winter Scene

Tuesday, February 15, 2022

February CAS Mix Up Reminder

Hi everyone.  Back with a reminder for the February CAS Mix Up Challenge, hosted by Susan.


For my launch card on the 1st, I used a technique to create this look using black card stock, gold heat embossing, and Finetec Metallic Pearl paints.

This time I'm using a different technique (one of the original ways to create Faux Cloisonne), which uses magazines, catalogues or any other printed medium on glossy paper.  The important part of the technique is to create a shiny, metallic, glossy look using glossy images with lots of metallic heat embossing.  Stamps with intricate designs work best with magazine images.

The card above uses a couple of pages from an old calendar that I was going to recycle from last year.  The lower leaf is stamped and heat embossed over a sunset with a small bit of yellow and orange from the sun, but mostly a deep blue sky.  The top leaf is stamped over an Autumn tree where the leaves are turning colour ... mostly yellow with a little orange.  You would never have guessed what the original photos are when you look at the leaves. :)

Close-up ...
I hope you'll give this fun technique a try.  The team has made some amazing samples to inspire you to play along.  


If you would like to subscribe by email,
please fill out the subscription form in the upper right sidebar.
It is also important to add sw1subscribers@gmail.com to your contact list
so Google recognizes the address and delivers the updates.

To unsubscribe, please use the same form on the right sidebar, making sure to add
"unsubscribe" to the message.
Thank you.


Stamps:  Lace Leaf - retired (Concord & 9th)
Paper:   White card stock (Neenah 110 lb.); Magazine pages
Ink:  Delicata Gold (Tsukineko); Blueprint Sketch Distress Ink (Tim Holtz)
Accessories:   Magazines, Princess Gold Embossing Powder (Ranger), Wander & Find stencil - retired (Carta Bella), sponge

Challenges:
CAS Mix Up February Challenge - Faux Cloisonne


Sunday, February 13, 2022

You Fill My Heart

Hi everyone.  Playing with another of the new release stamps from Penny Black - Fill My Heart (30-889).  I love this sweet bear, being carried through the air by his huge LOVE balloon. :)  Adorable.  

I started with a Slimline card panel, slightly smaller than the card base, sponging randomly in the sky with Salvaged Patina distress ink.  I stamped the image over top in black ink and heat embossed in clear.  Stamped it a second time onto a scrap piece of mixed media paper, again in black ink, heat embossing in clear.  I fussy-cut the bear image and LOVE balloons, then watercoloured using my Zig brush pens.  This saved me trying to fussy-cut the balloon strings (which would be impossible), plus the paper piecing adds a bit more dimension to my card front.  The balloons were coated with clear Wink of Stella for some sparkle, and then coated with Crystal Glaze to give it lots of shine and dimension.  

To finish, stamped the sentiment (from the same stamp set) in black, heat embossing in clear.  Fun card to make!

Close-up ...


Thanks for coming by for a visit!


Penny Black Products


If you would like to subscribe by email,
please fill out the subscription form in the upper right sidebar.
It is also important to add sw1subscribers@gmail.com to your contact list
so Google recognizes the address and delivers the updates.

To unsubscribe, please use the same form on the right sidebar, making sure to add
"unsubscribe" to the message.
Thank you.


Stamps:  Fill My Heart (Penny Black)
Paper:   White card stock (Neenah 110 lb.); Mixed Media paper (Strathmore 140 lb.)
Ink:   Salvaged Patina distress Ink (Tim Holtz); Black (Memento); Zigs
Accessories:   Sponge, waterbrush, Clear Wink of Stella, Crystal Glaze (Nuvo), red chalk, white Posca pen

Challenges:
Penny Black Saturday Challenge - Love is in the Air


Thursday, February 10, 2022

Happy Birthday Mom!

Hi everyone.  A couple of days ago, my mom turned 93! :)  She is AMAZING!  We gathered at her house (just seven of us --- obeying Covid restrictions) to celebrate.  Every year we order in dinner from a local restaurant and just have a good visit ... no work for anyone.  Gotta love that!

I made this card the morning of her birthday.  I know ... always late getting going, especially these days when I'm not feeling 100%.  I found a panel of flowers already stamped and watercoloured.  Cut the panel down, added a few score lines and stamped the sentiment.  Having the panel already watercoloured made it quick and easy to get her card done.

This is the Unfolding stamp from Penny Black.  It's so pretty and I love (what I am going to call peonies), watercoloured in pink.  My mom used to love working in her garden which is filled with flowers, including pink peonies. :)

The sentiment (Gratitude - Penny Black) is stamped in black to finish the card.

Close-up ...
Thanks for coming by for a visit!


If you would like to subscribe by email,
please fill out the subscription form in the upper right sidebar.
It is also important to add sw1subscribers@gmail.com to your contact list
so Google recognizes the address and delivers the updates.

To unsubscribe, please use the same form on the right sidebar, making sure to add
"unsubscribe" to the message.
Thank you.


Stamps:  Unfolding, Gratitude (Penny Black)
Paper:   White card stock (Neenah 110 lb.); Mixed Media paper (Strathmore 140 lb.)
Ink:   Black (Versafine); Distress Inks:  Worn Lipstick, Mowed Lawn, Pumice Stone (Tim Holtz)
Accessories:   water paint brushes, Scor-Pal

Challenges:
Penny Black Saturday Challenge - Anything Penny Black goes


Tuesday, February 08, 2022

Resin Art #1 and #2

Hi everyone.  Today I'm sharing an art technique that I am trying for the first time.  I decided a while ago that I would like to try resin pours.  Wanted to make some lovely pieces (decorative and/or functional) using resin and other products.  The canvas above is actually my second try.  First try (with lots of learning) is below.

I thought I'd take you along for the journey.  If you're not interested, more cards will be posted soon and you can ignore the Resin Art posts.

* * * * *

I bought a dozen small 4"x4" canvases (size of a coaster).  I thought they would be good for experimenting and learning.  I also have several silicone molds that I will be using.

For the canvas above, I started by doing a dirty pour (acrylic paints) over top of the primed canvas, white base with dark turquoise and gold accents.  I had a lot of paint on my canvas, so tilted it to let the excess drip off (used the leftover paint to create some pretty backgrounds for cards - YAY!).  

After the dirty pour was completely dry, I added some crushed gold glass glitter with a little cyan glitter, securing them in place with a drizzle of resin.  Finished by flooding the areas around the glitter with more resin and let it dry for 24 hours.  

Happier with this try over my first one (below).  Still lots more improvement needed.  Sorry for the glare from the resin, but there's no way to get a photo without glare from the shiny finish.

* * * * *

Below is my first experiment, starting with canvas as the base.  I learned a LOT about what NOT to do. :)  It's all good and I am going to keep a journal about what works and what doesn't and hopefully my artwork will get better as I learn more.  At least that is the hope! :)


The canvas above uses very similar colours.  I used colourings of Alcohol ink and pearl-ex powders, but none of them had enough added to create an opaque finish.  And I poured too much resin over top (clear coat) before it was time, so a lot of the resin ran over the sides, taking the colour with it.  This also exposed the texture of the canvas underneath, which is not what I was going for.  I sprinkled with cyan chunky glitter and diamond dust chunky glitter to add a little sparkle and called it a day.

The canvas is pretty, but needs more colour and more layers of resin. :)  A fail, but a win in the amount of things I learned.

I'll be back with another Resin Art pour next month.

Edited to add:  Resin is heat resistant up to 150C or 300F.  It is not heat proof, although you can buy a heat proof resin (not used for crafts), for making counter tops and table tops.


If you would like to subscribe by email,
please fill out the subscription form in the upper right sidebar.
It is also important to add sw1subscribers@gmail.com to your contact list
so Google recognizes the address and delivers the updates.

To unsubscribe, please use the same form on the right sidebar, making sure to add
"unsubscribe" to the message.
Thank you.


Saturday, February 05, 2022

Guest Designer at Penny Black Saturday Challenge

Hi everyone.  I'm so thrilled to be Guest Designing at Penny Black Saturday Challenge this month!  The challenge is "Love is in the Air" (perfect this time of year) or "Anything Goes".  

I stamped the image (Love Everywhere - Penny Black) onto mixed media paper in black ink and clear heat embossed.  I die-cut using the matching die (Love Everywhere Cut Out) and then watercoloured with distress inks.

A separate mixed media panel was sponged with Salty Ocean and Blueprint Sketch distress inks.  Clouds were added by using a sponge dauber and slightly diluted white acrylic paint.  Once dry, the background panel was die-cut using Semi-Circle Stackers frame dies (Penny Black).

Crystal Glaze was added to the hedgie's goggles and the row of hearts .  The sentiment (Fill My Heart by Penny Black) was stamped in two colours (Candied Apple distress ink, Memento black ink).  Finally, the airplane was popped up with foam onto the main panel for added dimension.

Close-up ...

I hope you'll check out the PBSC Challenge this month to see the wonderful inspiration cards from the Designers.  Come join in the fun! :)


Penny Black Products


If you would like to subscribe by email,
please fill out the subscription form in the upper right sidebar.
It is also important to add sw1subscribers@gmail.com to your contact list
so Google recognizes the address and delivers the updates.

To unsubscribe, please use the same form on the right sidebar, making sure to add
"unsubscribe" to the message.
Thank you.


Stamps:  Love Everywhere; Fill My Heart (both Penny Black)
Paper:   White card stock (Neenah 110 lb.); Mixed Media paper (Strathmore 140 lb.)
Ink:   Black (Memento); Distress Inks/Re-inkers:  Pumice Stone, Brushed Corduroy, Gathered Twigs, Rusty Hinge, Candied Apple, Salvaged Patina (Tim Holtz)
Accessories:   Love Everywhere cut out die (Penny Black), Sponge, Baby Wipe

Challenges:

Thursday, February 03, 2022

February CAS Christmas Challenge

Hi everyone.  Today is the start of February's CAS Christmas Challenge, hosted by Christine (It's a Card Day's Night).


Christine would like to see a Winter Scene with your cards this month.  I opted for a very CAS Christmas Winter Scene using Refined (Penny Black) for my winter bush, stamped in Coffee Archival Ink.  I added red berries with red acrylic paint, and snow on the branches and berries using a white acrylic pen.  The background is softly sponged Salvaged Patina ink (LOVE this colour!) and I used torn paper to mask snow hills, sponging with more of the ink.  The final addition was the stamped sentiment (Snowflake Season - Penny Black), inked with both candied apple and fired brick distress inks to match the colour of the red berries.

Close-up ...

We are thrilled to have Izzy (Izzy Scrap) as our Guest Designer this month!  Welcome Izzy!

Please check out the challenge blog to see the beautiful winter scene cards from Izzy and our Designers.  Hope to see you in the gallery!


If you would like to subscribe by email,
please fill out the subscription form in the upper right sidebar.
It is also important to add sw1subscribers@gmail.com to your contact list
so Google recognizes the address and delivers the updates.


Stamps:  Refined; Snowflake Season (both Penny Black)
Paper:   White card stock (Neenah 110 lb.); Mixed Media paper (Strathmore 140 lb.)
Ink:   Coffee Archival Ink (Ranger); Distress Inks:  Salvaged Patina, Candied Apple, Fired Brick (Tim Holtz)
Accessories:   sponge, white acrylic pen (Posca), Christmas Red acrylic ink (DecoArt), fine paint brush

Challenges:
CAS Christmas February Challenge - Winter Scene


Tuesday, February 01, 2022

February CAS Mix Up Challenge

Hi everyone.  Today is the start of the CAS Mix Up February Challenge, hosted by Susan (Cat's Inkcorporated).


Susan wants us to try Faux Cloisonne (instructional videos are on the challenge blog).  This technique gives the look of enamelled jewelry and is so pretty!  Below is a photo of Cloisonne Jewelry.


For my card above, I started with black mixed media paper (black card stock would have worked), stamping Ebullient (Penny Black), several times in Gold Delicata ink and then heat embossing in Princess Gold embossing powder.  I found it easier to see I got a clean stamp with the gold ink, rather than using Versamark clear ink.  I used my Finetec Pearlescent Paints to watercolour the design.  I heated up the image again to allow the gold heat embossing to come to the top before cutting my panel to size.  I popped it up with foam on a black card stock back which I had stamped with the sentiment (Heartfelt - Penny Black) and heat embossed with the same gold embossing powder.

This took a while to paint, especially the background.  Next time I will try painting the whole background before heat embossing the design ... should save a lot of time. :)

Close-up ..

I hope you'll check out the challenge blog to see the different ways you can create the Faux Cloisonne technique ... and then come play along.  


If you would like to subscribe by email,
please fill out the subscription form in the upper right sidebar.
It is also important to add sw1subscribers@gmail.com to your contact list
so Google recognizes the address and delivers the updates.


Stamps:  Ebullient; Heartfelt (Penny Black)
Paper:  Black Mixed Media card stock
Ink:   Delicata Goldr (Tsukineko); Pearlescent Paints (Finetec)
Accessories:   Princess Gold embossing powder (Ranger); paint brushes

Challenges:
CAS Mix Up February Challenge - Faux Cloisonne