Hi everyone. This month
Group of Seven Cardmakers is Smooshing with Cling Wrap. This is an older technique that most of us have tried. But fast forward several years and there are so many new products on the market that would work with this easy technique that gives amazing results. I hope you'll give it a try using a variety of substraits and mediums from your stash. :)
Please check out the details for the technique and link to video on the blog ...
Here's what I learned when I experimented with this technique with different substraits and mediums ...
- The card used made the most difference. Mixed media paper, coated card stock or Bristol worked the best for me, giving me the most "cells" that really make this technique special. Watercolour paper came in next with mixed results. Regular card stock gave the least amount of "cells" and is better suited for just smooshing, in my opinion.
- When smooshing with powdered inks, the easiest way to get the card wet with colour is to let the misted powdered inks sit on your work mat for a couple of minutes so the crystals start to dissolve before smooshing with card and then adding cling wrap. Brushos and Bister powdered inks gave me the most beautiful backgrounds. Powdered inks with mica powders (shine) like Magicals and Perfect Pearls, usually let the shine ingredient show in the creases, which in most cases, resulted in a subtler look which is so pretty! Everyone will have different results depending on their method of adding water and how much water ... so experiment to find what works best for you! :)
For the card above, I used Bister powders (powdered inks with walnut stain). Because of the walnut stain added to the colours, they all have a warmth about them. I used Bister Blue, Bister Green, and Bister Dark Brown for my card above. I sprinkled them onto my work mat, misted with water and let the crystals activate before smooshing with mixed media paper. I flipped the card over and placed a piece of cling wrap over the wet ink, scrunching up the cling wrap to create lots of creases. I left it to dry for a couple of hours before removing the cling wrap and then left the card to completely dry before finishing.
I stamped with a silhouette stamp I received from Maureen through the Rudolph Days Challenge --- isn't it fabulous??!! I stamped in Black Memento ink and added a torn snowhill at the bottom before splattering with white acrylic paint for snow. LOVE IT!
Close-up ...
... and here's more cards I made using this awesome technique. Again I used mixed media card with Bisters (Red, Yellow, Natural). I LOVE the natural colours of these powders. I got two cards from the one panel. :)

If you would like to subscribe by email,
please fill out the subscription form in the upper right sidebar.
Make sure to add "subscribe" to the message.
It is also important to add SWL1subscribers@gmail.com to your contact list
so Google recognizes the address and delivers the updates.
To unsubscribe, please use the same form making sure to add
"unsubscribe" to the message.
Thank you.
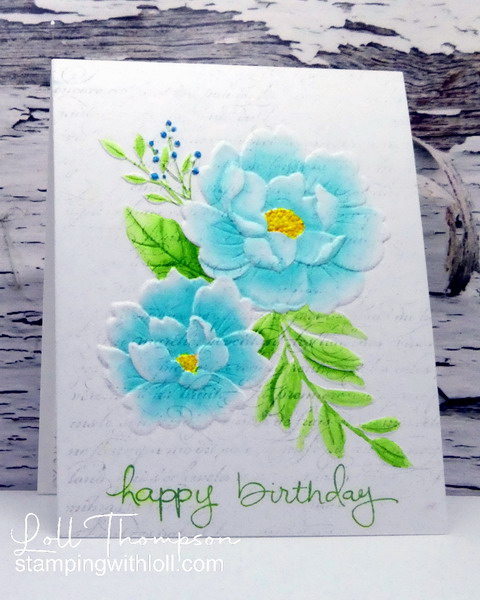
Card #1:
Stamps: Stamp #391 (Studio Light Essentials)
Paper: White card stock (Neenah 110 lb.); Mixed Media paper (Strathmore 140 lb.)
Ink: Bister Powders: Bister Blue, Bister Green, Bister Dark Brown; Versamark; Black (Memento)
Accessories: Water mister, cling wrap, clear embossing powder (Ranger), heat tool, diluted white and black acrylic paint, splatter brush
Card #2 & #3:
Stamps: Birthday Blowout (Poppy Stamps - retired); A Little Sentimental (Clearly Besotted - retired)
Paper: White card stock (Neenah 110 lb.); Mixed Media paper (Strathmore 140 lb.); Black card stock (SU!)
Ink: Bister Powders: Bister Red, Bister Yellow, Bister Natural; Versamark; Black (Memento)
Accessories: Water mister, Cling Wrap, Freida Curve Die (Poppy Stamps), Black acrylic paint (diluted), Flower Frolic die (Penny Black), diluted black acrylic paint, splatter brush