Tuesday, January 29, 2013

Have a Sweet Day!


Hi everyone.  Here's my Design Team card for the latest Addicted to Stamps & More challenge - Sketch #5.  Here's the sketch for today's challenge:


Prize:  7 digital images 
 (please follow the rules of the challenge to be eligible to win)


Today's sponsor is Bugaboo stamps and I just love working with their sweet images ... and I think this is the sweetest of all! :)  This teddy bear is all dressed up with her most beautiful hat ... and I imagine that she's on her way to a tea party! :)  Just love pink and green together ... so fresh and spring-like.  Hope you like.

Here's another picture from a different angle so you can see more detail of the rolled rose:


Stamps:  Teddy Rose Hat (Bugaboo); Sweet Sentiments (Amy R)
Paper:  White (C.C. Designs); Soft Suede, Crumb Cake, Certainly Celery, Pretty in Pink, Certainly Celery polka-dot DP (SU!)
Ink:  Soft Suede, Crumb Cake, Certainly Celery, Mambo Melon, Black (SU!)
Accessories & Tools:  Big Shot, Square and circle nestabilities (Spellbinders), Leaves die (My Favorite Things), Polka-dot embossing folder (Sizzix for SU!), Stamp-a-ma-jig, blender pen, glue, adhesives, and dimensionals


The teddy bear is paper pieced, using several layers for added dimension.  I sponged around all the pieces to give them more depth and interest and then glued them on top of each other.  For the roses on the hat, I used Pretty in Pink cardstock, and then added more color with Mambo Melon ink and a blender pen.

The rolled rose is a circle cut from Pretty in Pink cardstock that was run through with the polka-dot embossing folder.  Tip:  when making rolled roses, it's a good idea to use patterned paper as it's lighter weight and easier to roll and shape, but if you want to use cardstock (as I did here), embossing it first softens the paper and makes it easier to roll.  After cutting a spiral into the circle, I sponged all the edges with Mambo Melon ink before rolling and gluing.

The front panel of the card with the square cut-out is popped up for more dimensional, as is the Teddy Bear.

Here's a close-up picture of the teddy bear.  Isn't she sweet??!!


I hope I have inspired you to join us for this fun challenge.  Check out the other fabulous creations by the Design Team at ATS&M!


Sunday, January 27, 2013

For Diane and Bonnie


Hi everyone.  Had a bit of time to play in my studio yesterday and today.  Still really busy these days, spending time at the hospital with my DSIL ... and now my MIL is also in the hospital (different one).  So it's been pretty hectic to say the least.  The good thing about finding some time to play, is not only that I love making cards, but it's a bit of an escape from all the worries of late.  When I'm making a card, I am concentrating so hard on the design, etc., that I forget about other things ... especially the time, so my hubby does have to come in a bring me back to reality once in a while or he'd never get his dinner :)

Today I have two cards for you ... both honoring two very talented card-makers that not only have their own blogs, but also post on SCS, which is where I "met" them.

The card above is to honor Diane (Charmingly Creative).  Diane has a wonderful gallery and I chose this card to CASE in her honor.  Not only is she super creative, but she leaves the most encouraging comments on my cards and this is my opportunity to thank her.  So Diane, thank you and I hope you like the card I made in your honor!!  I used the colors from this week's Color Throwdown challenge (see link below).


Stamps:  A Word For You; En Francais (SU!)
Paper:  White; Certainly Celery striped DP; Certainly Celery, Garden Green, Perfect Plum (SU!)
Ink:  Certainly Celery, Garden Green, Elegant Eggplant (SU!)
Accessories & Tools:  Big Shot, Little Leaves die (Sizzix), Pine Branch punch (McGill), Hydrangea punch (Martha Stewart), mauve mini-half pearls, sponges, glue, adhesives and dimensionals


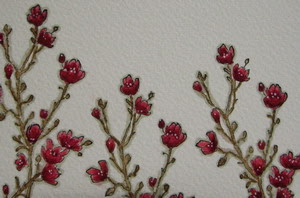
Here's a close-up of the flower spray:


I'm entering this card into these challenges:

SCS Queen For the Day (QFTD149)
Color Throwdown (CTD226)

____________________


The second card is to honor Bonnie (Stamping with Klass).  Bonnie has been chosen as the Featured Stamper at SCS (FS319 - bon2stamp) this week.  I subscribe to Bonnie's blog and have learned so much from her over the past year.  She has a wonderful style and several of her creations are CAS, which I love.  Congrats Bonnie - enjoy your week!!

I chose this card of Bonnie's to CASE, just changing it from a Christmas card to Valentine's Day.


Saturday, January 26, 2013

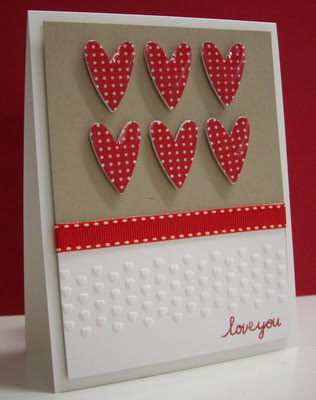
love you ...


Hi everyone.  Here is my Design Team card for the latest Addicted to CAS challenge.  Each challenge has a code word to inspire your creations.

It's my turn to be in charge of this challenge (each DT member is taking a turn) ... and I picked this love-ly code word!


$10 GIFT VOUCHER
will be awarded to the CAS PERFECTIONIST
(please follow the rules of the challenge to be eligible to win)


Stamps:  Short & Sweet (SU!)
Paper:  White (Neenah)
Ink:  Basic Black (SU!)
Accessories & Tools:  Big Shot, Adorning Accents embossing folder (Sizzix), heart punch, Sprinkles - Chili Hearts 6mm (Annabelle Stamps), glue, Stamp-a-ma-jig, and dimensionals

To make the heart:  I punched a heart from thick white cardstock and then hand-cut around the punched shape, creating a thin (about 1/8") heart frame.  I glued on the Chili Heart Sprinkles (Annabelle Stamps) around the frame and then glued it onto my card front, over top of the heart embossed border.


Here's a close-up of the heart, which also shows more detail of the heart embossing in the background.  LOVE these pretty red heart Sprinkles.


I hope you'll join in on the fun challenge at Addicted to CAS.  Come and check out the wonderful samples from the other Design Team members.


Friday, January 25, 2013

A Cup of Thanks


Hi everyone.  Here's another card I made for my upcoming class on Feb. 2 with the Crafty Girls.  I made a super CAS (clean and simple) card using the Tea Shoppe stamp set from SU!  I absolutely love Rich Razzleberry and Old Olive colors together - such a great color combo.  And this card also gives the girls the opportunity to try a new technique (paper piercing).


Stamps:  Tea Shoppe (SU!)
Paper:  White
Ink:  Rich Razzleberry, Old Olive (SU!)
Accessories & Tools:  Piercing template, piercing tool and mat; Stamp-a-ma-jig, Hydrangea punch (Martha Stewart), mini half pearl, glue, adhesives, and dimensionals


The tea cup is stamped, cut out and popped up inside the pierced area of the card front to add dimension to the card.

Here's a close-up of the main image:


Tuesday, January 22, 2013

Polka-dot Birthday


Hi everyone.  Here's my DT card for the latest challenge at Addicted to Stamps & More - CAS#5.  I love CAS, so this is was an easy card for me.  I used an adorable digi from this week's sponsor ... Bugaboo ... called fat mice flower.  I made this card for one of my good friend's birthday that's coming up in a few months.  She loves mice (the stuffed toy kind, not the real ones!!) ... and polka-dots - so when I saw this image I knew exactly who I was making this card for.  I paper pieced the mouse ... and I also paper pieced the flower, but added a twist by using the paper tole technique to give the flower some depth.

Our challenge runs for one full week, so you have lots of time to create a CAS card to enter.  We have a fabulous prize of 7 digital stamps from Bugaboo (click on the highlighted link below to check out their adorable digital images).  Come join in the fun!!


Prize:  7 digital images 
 (please follow the rules of the challenge to be eligible to win)


Stamps:  Fat Mice - Flower (Bugaboo); Sweet Sentiments (Amy R)
Paper:  White (C.C. Designs); basic gray polka-dot, red & white DP (SU!); light gray (unknown)
Ink:  Basic Black (SU!); Copics G43
Accessories & Tools:  Gray twine (The Twinery), distressing tool (Making Memories), glue, glue dots, and adhesives


As I mentioned above, both the mouse and flower are paper pieced.  I also used the paper tole technique on the flower.  After paper piecing one layer of the red and white polka-dot DP onto the flower, I printed off a second flower and cut out each petal individually.  For each petal, I added a rolled up glue dot at the tip and a dab of glue at the other end (where it joins the center of the flower).  This makes the petal flush at the center, but the end of each petal is raised up with the rolled glue dot - love it!!  I used my distressing tool to distress a piece of white cardstock ... then I gathered up all the fluffy bits from the distressing and glued them to the center of my flower.

Here's a close-up of the mouse and flower:


... and here's another angle.  Hopefully you can see the depth of the paper tole on the flower ...


I hope I've inspired you to join us for this fun challenge at Addicted to Stamps & More.  Come and check out the wonderful samples from the other Design Team members.


Monday, January 21, 2013

Agapanthus Blocks


Hi everyone.  Haven't had much time in the studio the past several days.  My DSIL is very ill with Cancer and I've been taking her for some of her treatments.  It's been such a difficult time for her, and so I've tried to be there for her as much as possible and to help in any way I can.

I did have a little time a few days ago, so I CASE'd (copy and share everything) one of my own cards.  I am planning a card class for the beginning of February with my crafty girlfriends.  The card above is a re-make of the one below, which I made in August of last year.  It uses the same stamps and ink colors, but is quite a bit different in the feel of the card.  My plan is for us to make both cards in the class to highlight the versatility of just changing up one element (layout).  I think it's fun ... and I hope they will too.  I will be designing more cards for the upcoming class over the next while - I just love having these classes and sharing my passion for card making!

Here's the card from last summer that I CASE'd for the card above.  Click here to see the details.


Stamps:  Agapanthus Long (Stampendous); En Francais and Pocket Silhouettes (SU!)
Paper:  White
Ink:  Kiwi Kiss, Old Olive (SU!)
Accessories & Tools:  Big Shot, Embosslits Beautiful Wings (Sizzix for SU!), small oval punch, sponge, adhesives, glue dot, and dimensionals


Here's a close-up of the main panels from the first card:


____________________

I've had a couple of successes over the past week.  First, this card was picked for "A Cut Above" at Paper Players ... and this card made the Top 3 at CAS - Colours and Sketches Challenge.  Thanks so much to Jaydee and Jacqueline for picking my cards!!


Wednesday, January 16, 2013

Happy Anniversary, My Friend


Hi everyone.  This is a special post for my good friend Dolly (Darnell)!!!!  Happy Anniversary to you and Mister - hope you have a fabulous day!  After seeing 'old' pictures of Dolly and Mister when they were young adults, I realized that they must have posed for this image ... can you see the resemblance, Dolly??!!

Thanks to Ardyth for organizing this fun event to honor Darnell ... and to Shirley-Bee for letting me know about it! :)  I'm sure many of my blog followers have visited Darnell's blog ... but if you haven't, please check it out - she has the most wonderful sense of humor and reading her blog is one of the highlights of my day.  Click here for the link.

Here's the info on the card:


Stamps:  Bike Ride (Bugaboo); Pals Penguin (Lisa's Doodley Doos)
Paper:  White (C.C. Designs)
Ink:  Copics:  E000, E00, E01, R29, R59, YG95, YG97, B39, B97, BG72, Y21, Y32, W4, E44, E77, 0 (colorless blender); Stampin' Write markers:  Basic Black, Basic Gray
Accessories & Tools:  dimensionals ... yep, that's it :)


Here's a close-up of Dolly and Mister - you can tell they are sooooo in love!!


Tuesday, January 15, 2013

Thanks a Latte!


Hi everyone.  This is my Design Team card for the latest Addicted to Stamps & More challenge - Addicted to [Black & White] #5.  It's such a classic color combination ... and when I saw this digital stamp, I knew it would be perfect.  Just the tiniest bit of red finishes it off nicely.


Prize:  7 digital images 
 (please follow the rules of the challenge to be eligible to win)


Stamps:  Coffee Time Thanks a Latte (Bugaboo)
Paper:  White (C.C. Designs); Black polka-dot DP (SU!)
Ink:  Copics:  R27, W4; black marker (Sharpie)
Accessories & Tools:  Crystal Effects, clear stickles, double-stitched black ribbon (Michael's), mini black brad, adhesives, sticky strips, and dimensionals


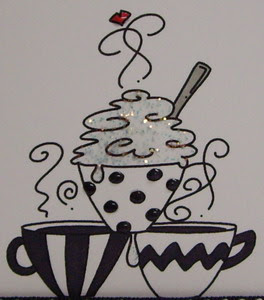
I used an adorable image from this week's sponsor - Bugaboo.  I colored it with copics and added a little Crystal Effects to the heart and polka-dots on the middle coffee cup ... and clear stickles to the foam (or whipped cream) ... which ever you'd like to think is on top of the coffee! :)  For the banner, I just used my thumb and fingers to give it a little shape and then secured the one end with a brad and added a dimensional part way along to secure it in place.

Here's a close-up of the main image:


I hope I have inspired you to join us for this fun challenge.  Check out the other fabulous creations by the Design Team at ATS&M!


Sunday, January 13, 2013

Spring Window Box


Hi everyone.  Yesterday I had fun hanging out with my crafty girlfriends.  We played in the art studio all afternoon and each made two cards.  Here's my first one ... and it fits two challenges - Inspirational #2 - Photo Inspiration (see picture below) and Color Throwdown (CTD224 - Almost Amethyst, Certainly Celery, Regal Rose, So Saffron).  Love these colors ... definitely made me think of spring flowers.

Here's the photo inspiration:


Stamps:  A Word for You (SU!)
Paper:  White (C.C. Designs); Certainly Celery, Regal Rose, So Saffron (SU!); pale purple (unknown)
Ink:  Basic Black, Regal Rose, So Saffron, Perfect Plum (SU!)
Accessories & Tools:  Arched Madison Window die and Small Window Box die (Poppy Stamps), mini sun punch (Punch Bunch), Hydrangea Punch (Martha Stewart), Itty Bitty Flower punch (SU!), Leafy Branch die (C.C. Designs), Pine Branch punch (McGill), sponges, Stamp-a-ma-jig, stylus, mat, white gel pen, and glue


I die-cut three of the window dies and glued them together to create a thick die.  I glued it to my card front and then glued down a few leafy branches and pine branches at the bottom before gluing on the window box.  Then I added flowers, each which have been punched out, sponged on the edges to add depth and shaped with my stylus and mat.  I added white dots to the centers of the pink flowers using my white gel pen.

Here's a close-up of the window and flower box:


Saturday, January 12, 2013

Rainbow and Clouds


Hi everyone.  Here is my Design Team card for the latest Addicted to CAS challenge.  Each challenge will have a code word to inspire your creations.


Karen is in charge of this challenge and here it is ...


This week's sponsor is


Prize:  Free digis
will be awarded to the CAS PERFECTIONIST
(please follow the rules of the challenge to be eligible to win)


Stamps:  Word Salad (Paper Smooches)
Paper:  White (C.C. Designs); Baja Breeze (SU!)
Ink:  Basic Black (SU!)
Accessories & Tools:  Big Shot, Puffy Clouds Dies (Memory Box), polka-dot embossing folder (Sizzix), Oval Nestabilities (Spellbinder), Twine - Peapod, Lemondrop, Mandarin, Pink Sorbet (The Twinery), glue, and dimensionals


I die cut an oval from white cardstock and the glued the twine along the curve, using three pieces of each color.  I cut down the cardstock after I was finished to create the rainbow shape.  The cloud dies are two layers each, which are glued together to create a thicker die.


Here's a close-up of the main image:


I hope I have inspired you to join us for this fun challenge (thanks Karen!).  Check out the other fabulous creations by the Design Team members at ATCAS!


Friday, January 11, 2013

Simply Soft Watercoloring


Hi everyone.  Today I'm posting three cards all made with this week's colors from SCS Color Challenge (CC408 - Very Vanilla, Soft Suede, Raspberry Ripple).  LOVE this color combo!!  And, the cards all used the same stamp set (Simply Soft from Stampin' Up!) ... and the same technique, Marker Layering.  I thought that since I had pulled out my watercolor paper, I might as well stamp up a few images and ended up making them all into cards.  Hope you like.


Stamps:  Simply Soft, A Word for You (SU!)
Paper:  Watercolor paper; Soft Suede (SU!)
Ink:  Black, Soft Suede, Raspberry Ripple, Sahara Sand (SU!)
Accessories & Tools:  Big Shot, Square Lattice embossing folder (Sizzix for SU!), blender pen, modern label punch, 3/8" Soft Suede Taffeta ribbon, white gel pen, Stamp-a-ma-jig, brown half-pearls, sticky strips and dimensionals


Here's a close-up of the flowers:


I had so much fun using the same technique with yesterday's card, that I decided to do some more.  As mentioned above, the next two cards are done with the same colors, techniques and most of the same accessories with the exception of switching out the embossing folder to the Floral Screen EF by Cuttlebug.  Hope you like.


Sorry for the blurry picture, my camera is on it's last legs :(  I distressed the edges of both the framing of the image and the embossed background paper to give the card interest.

Here's a close-up:


____________________

And one more ...


I used a different stamp this time, but it's from the same stamp set (Simply Soft).  This time I sponged the embossed panel to give it more definition.

Here's a close-up:


Thanks for taking a look!