Showing posts with label Christmas ornaments. Show all posts

Saturday, November 18, 2023

Christmas Ornaments 2023

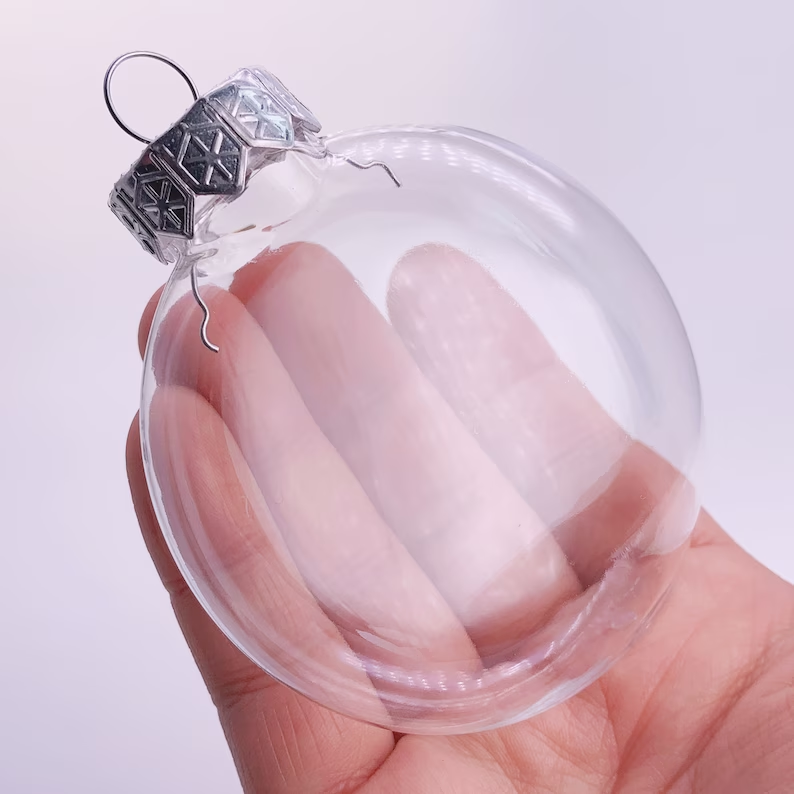
Hi everyone.    I'm making Christmas ornaments again this year.  This time I'm using flat round 3" glass ornaments (round ornaments of glass that are hollow, approx. 1" thick, with the front and back flattened slightly - see below photo) that I purchased from Michaels at the end of last year.  Drips of alcohol inks are added to the outside of the glass ornaments to create the designs.  It's also a great way for me to use some of my stash of many bottles of alcohol inks. :)

I had a play day with my dear friend, Fran.  We each made a few ornaments - so fun!  We followed this video:  Christmas Ornament Tutorial using Alcohol Inks by Michelle Fountain.  As always, when working with alcohol inks, make sure your area is well-ventilated and wear protection so you don't have a big mess to clean up at the end.  We wore gloves and had lots of paper towels on hand.

We used the same process as the video, adding drops of inks over the ornaments and used a fine tip applicator to add streams of rubbing alcohol to break up the metallic inks.  I love the random look you get when using the rubbing alcohol.  It's important to leave areas of glass without any inks on them to allow the tree lights to filter through.

Above is my favourite ornament of the day using only two colours, red and gold.  I can't wait to see what it looks like on my tree with some lights behind it. :)  I will list the colours of inks I used on the three ornaments near the bottom of this post.

Sending the above ornament to Color Hues #76 - Red and Metallic Gold.  Perfect! :)

... and since this is the first time I've used the glass ornaments, I'm also entering the above ornament into NBUS Challenge #56. 

I finished all three ornaments in the same way, adding some drips of Rainbow Alcohol Ink (Marabu), which is clear with mica glitter.  It adds a colourful, glittery finish which is so pretty.  The caps for the ornaments were all silver, so I left it original for the purple ornament.  For the ornaments with gold drips, I added 2-3 layers of Princess Gold Embossing powder, heat setting after each layer.  I added a decorative hanger and voila --- gorgeous one-of-a-kind ornaments. :)

Here's two more I made that day ...
Sending the above ornament to Merry Little Christmas Challenge #53.


#1 Alcohol Inks:  Aqua, Clover, Stream, Sailboat (all from Ranger); Gold (Pinata); Rainbow (Marabu)
#2 Alcohol Inks:  Pearl Villianous (Purple), Eggplant, Silver (all from Ranger); Rainbow (Marabu)
#3 Alcohol Inks:  Pearl Sublime (Lime), Turquoise, Meadow Green (all from Ranger); Gold (Pinata); Rainbow (Marabu)

Thanks for stopping by!


If you would like to subscribe by email,
please fill out the subscription form in the upper right sidebar.
Make sure to add "subscribe" to the message.
It is also important to add SWL1subscribers@gmail.com to your contact list
so Google recognizes the address and delivers the updates.

To unsubscribe, please use the same form making sure to add
"unsubscribe" to the message.
Thank you.


Supplies:  Flat Round 3" Glass Oraments (Michaels), Alcohol Inks (Colours: Ranger, Pinata; Metallics: Ranger, Pinata; Rainbow: (Marabu), Rubbing Alcohol, Needle-nose Applicator bottle, Versamark ink, Princess Gold embossing powder (Ranger), Sponge paint brush, Durable Gloss Finish (Martha Stewart - discontinued), decorative hangers (Amazon)


Sunday, November 21, 2021

Star Ornaments

Hi everyone.  I've made a few more ornaments to donate to my friend Susan's charity fundraiser.  Not sure if I mentioned, but this will be the first time we are making ornaments to sell.  Usually there is cards and shortbread.

I used wooden star ornaments that I bought from AliExpress.  All five of these ornaments in this post were painted with red acrylic paint for the bases.  Three of them have a crackle finish over top, which shows a little of the red peaking through.  The rest are a mix of watercoloured and card stock die-cuts, along with stamped and heat embossed sentiments.  It was a lot of fun making these.


I used a lot of snippets on these ornaments, so sending them over to the Snippets Playground - Challenge #416.

Thanks for stopping by!


If you would like to subscribe by email,
please fill out the subscription form in the upper right sidebar.
It is also important to add sw1subscribers@gmail.com to your contact list
so Google recognizes the address and delivers the updates.


Challenges:
Snippets Playground Challenge #416

Sunday, November 07, 2021

Mini Retreat Ornaments

Hi everyone.  Last week I spent three days with my good friends, Susan and Christine.  We got together at Christine's house, creating Christmas Ornaments to sell at Susan's annual Fundraiser Sale.

It was a lot of fun.  Very relaxing just creating and chatting.  There were no new techniques to learn, no set schedule.  Just craft, eat, craft some more, and eat a lot more. :)  It was a fun three days after being cooped up at home for the past two years.

Today all three of us are sharing photos of some of our ornaments.  I hope you enjoy seeing what we created.

Here they are ... 


The round wooden ornaments are all covered on the front with patterned paper (Craft Consortium Ink Drops - Dusk and Craft Consortium - Vivid) that I recently bought.  It looks like alcohol inks and makes lovely backdrops for the variety of dies that I used to decorate.  I used a gold gel pen to follow along some of the veining on the paper, which added a bit of shimmer.  The star ornament is painted with gold acrylic paint, as well as the backs of all the ornaments and the hangers are either gold or silver.

I hope you'll check out the ornaments made by Susan and Christine.  The ornaments really show how different our style of creating is ... lots of beautiful ornaments to see! 

Mostly used scraps for all the ornaments.  So sending this over to Snippets Playground - Challenge #415.


Sunday, December 20, 2020

Thank you!

Hi everyone.  I want to thank all that support me by visiting my blog.  I appreciate everyone who stops by for a visit.  I LOVE making cards and it makes me happy to share them with you!

I am going to sign-off my blog today and take a much needed break after a hectic year.  Before I go, I'm sharing three ornaments below.  These were so much fun to make and I hope to make more next year if time permits.

I will be back on January 1st, raring to go with the first CAS Mix Up challenge of the year.  I hope you'll be back to check it out.

To all that celebrate the season in one way or another,
Happy Holidays and Merry Christmas!


Please stay safe!  

Love,