Showing posts with label outlining. Show all posts

Tuesday, March 26, 2024

IDEAS - Anything Goes

Hi everyone.  Today's card is for the IDEAS Challenge with Darnell.  This week is "A - Anything Goes".
For my Anything Goes, I'm using a NBUS stencil (Fir Branch - The Crafter's Workshop).  I've had this stencil for a long time, so I'm happy to finally be showing it some love. :)  I sponged over top of the whole stencil with Shabby Shutters Distress ink and then more colours over top (Peeled Paint for the Needles, Gathered Twigs for the pinecones).  To finish, I used the Ground Espresso marker to outline the pinecones sections, and Mossy Meadows (SU!) marker to add a line at the top of each needle.  I removed the stencil and then to give the pinecones more umph, I lightly sponged Gathered Twigs over top to fill in any white space.  A simple sentiment (SU! retired) stamped in more Ground Espresso finishes the card.  

Close-up ...
I'm sending the above card to NBUS Challenge #60.
Thanks for stopping by!

Stamps:  Christmas Greetings (SU! - retired)
Paper:   White card stock (Neenah 110 lb.); Mixed Media (Fabriano 108 lb.)
Ink:   Distress Inks:  Shabby Shutters, Peeled Paint, Gathered Twigs, Ground Espresso (Tim Holtz)
Accessories:   Fir Branch Stencil (The Crafter's Workshop), sponges

Friday, December 09, 2022

Poinsettia Embossing Folder

Hi everyone.  I've had a play with the Tim Holtz 3D Poinsettia Embossing Folder ... this time embossing on red foil card stock.  I love the look of the elegant foil but the flowers did seem to get lost.  I used a silver pilot pen (permanent ink) to outline the embossed images and it made a huge difference. :)

I adhered my card front onto a card base and stamped the sentiment in silver on the inside of the card.

* * * * *
I decided to make another ... this time the embossing got crinkled on the outside edges, so I trimmed down my panel before outlining the same as above.  Then adhered my card front to my card base, and stamping the sentiment on the inside.

Two very quick and easy cards. :)

Thanks for stopping by!


If you would like to subscribe by email,
please fill out the subscription form in the upper right sidebar.
Make sure to add "subscribe" to the message.
It is also important to add SWL1subscribers@gmail.com to your contact list
so Google recognizes the address and delivers the updates.

To unsubscribe, please use the same form making sure to add
"unsubscribe" to the message.
Thank you.


Paper:   White card stock (Neenah 110 lb.); Red Foil card stock (Tonic)
Accessories:  3D Poinsettia embossing folder (Tim Holtz); Silver ink pen (Pilot) 


Thursday, August 25, 2022

Snowflake

Hi everyone.  Today's card is for the Rudolph Days August Challenge - Anything Christmas Goes. 

I'm sharing a card made from my stash of card fronts.  Over the years I have made several card fronts when crafting with friends (in-person or on-line).  I have been inspired by my sweet friend, Bonnie (Stamping with Klass) to finally make these card fronts into cards. :)  She has been working for months going through her box of unused items and has made so many amazing cards.  Thanks for inspiring me, Bonnie! :)

The card above was made using the stenciling monprint technique (ink'ing the stencil background (acetate cut with my Silhouette Cameo), spritzing with water, turning it over onto a piece of mixed media paper).  It's a great way to stretch the use of your stencils by getting a negative image.  You need to blot with paper towel to absorb any stray ink so that the stencil image is clean and shows the colour of your card front.  I used magicals to make this background ... you can see all the variations of colours.  Once dry, I used a permanent silver pen (Pilot) to outline the snowflake.  The panel is popped up on foam for added dimension and the sentiment Christmas Sentiments (Penny Black) is silver heat embossed on my card base.

Close-up ...
You can see the shimmer from the magicals in this photo, along with the shine from the silver pen.

Thanks for stopping by!


If you would like to subscribe by email,
please fill out the subscription form in the upper right sidebar.
Make sure to add "subscribe" to the message.
It is also important to add SWL1subscribers@gmail.com to your contact list
so Google recognizes the address and delivers the updates.

To unsubscribe, please use the same form making sure to add
"unsubscribe" to the message.
Thank you.


Stamps:  Christmas Sentiments (Penny Black)
Paper:   White card stock (Neenah 110 lb.); Mixed Media paper (Strathmore 140 lb.)
Ink:   Magicals (Lindy's); Versamark
Accessories:   Snowflake stencil (cut file from Silhouette America), acetate sheet, Silhouette Cameo, water mister, silver pen (Pilot), silver embossing powder (Ranger), heat tool

Challenges:
Rudolph Days August Challenge - Anything Christmas Goes


Friday, August 12, 2022

Have a Blue, Blue, Blue, Blue Christmas!

Hi everyone.  Today I'm playing along with the current challenge at Peace on Earth - #21.  I was inspired to join in after seeing the beautiful DT card made by my friend Susan.  Thanks Susan!

LOVE all the gorgeous images in blue, silver and white that are part of the mood board for the challenge ...
I've made two blue Christmas cards today.  The first one (above), started with a stencil (Layering Poinsettia - Tim Holtz), sponged with two shades of blue distress ink (Broken China, Chipped Sapphire).  I used a small sponge dauber to added colour to the poinsettias, and then a very small round brush to add colour to the holly leaves.  This helped to keep the colours separated.  Once finished, I used a permanent silver pen (Pilot) to outline both the poinsettias and holly leaves.  I die-cut a top piece using a curved and stitched die (Stitched Borders die - Pretty Pink Posh).  The sentiment (Season's Gifts - Penny Black) is stamped and heat embossed in silver.

Close-up ...

On to the second card ... very CAS (clean and simple) design ...
For this card, I used a NBUS (never-before-used-schtuff) stamp set from AliExpress of poinsettias.  I heat embossed the flowers in white before watercolouring in two shades of blue distress inks (Tumbled Glass, Broken China) ... this is Emboss Resist technique.

I added a thin white frame (Fine Frames Square Dies - Altenew) to my card base and then added the fussy-cut poinsettia's on top, layering them to create dimension.  I finished my CAS design with a die-cut Joy (also AliExpress) from blue watercoloured paper.

Close-up ...
I'm also sending this over to NBUS Challenge #41 (second entry). :)

And, I'm also sending this to CAS Mix Up August Challenge - Emboss Resist.

Thanks for stopping by!


If you would like to subscribe by email,
please fill out the subscription form in the upper right sidebar.
Make sure to add "subscribe" to the message.
It is also important to add SWL1subscribers@gmail.com to your contact list
so Google recognizes the address and delivers the updates.

To unsubscribe, please use the same form making sure to add
"unsubscribe" to the message.
Thank you.


Card #1:
Stamps:  Season's Gifts (Penny Black)
Paper:   White card stock (Neenah 110 lb.)
Ink:   Distress Inks:  Broken China, Chipped Sapphire (Tim Holtz); Delicata Silver ink (Tsukeneko)
Accessories:  Layering Poinsettia stencil (Tim Holtz); sponges, silver pen (Pilot), Stitched Borders die (Pretty Pink Posh), silver embossing powder (Ranger), heat tool

Card #2:
Stamps:  Poinsettias (AliExpress)
Paper:   White card stock (Neenah 110 lb.); Mixed Media paper (Strathmore 140 lb.)
Ink:   White Pigment ink (Unicorn by Hero Arts); Distress Inks:  Tumbled Glass, Broken China (Tim Holtz)
Accessories:   White embossing powder (Ranger), heat tool; w/c paint brushes, Joy die (AliExpress); Fine Frames Square (Altenew)

Challenges:
Peace on Earth #21 - Anything Christmas Goes

Friday, October 15, 2021

CAS Challenges October Reminder


Hi everyone.  Time for the reminder cards for the October CAS Challenges.  First up, CAS Mix Up, hosted this month by Bonnie.

Bonnie is our host.

I went out and picked up a few maple leaves from my yard.  The card above uses a small leaf that I coated with Gold Liquid Watercolour Concentrate and then pressed it through my Gemini Jr. with mixed media paper.  I love how the gold paint shows all the veins.  It's very subtle, but still very pretty.  I added a soft suede card stock base, along with a gold splattered backing to my main panel.

Close-up ...

I did a second print using a large maple leaf.  Using Hot Press watercolour paper and my Gemini Jr., I got two prints, this is the side with all the wonderful autumn colours (see photo below of leaf), which translated to pale green, yellow and purple when pressed.


Maple Leaf
I created a frame from seedless preserves by sponging around the outside edge of a piece of Hot Press watercolour paper and then sponging with gold watercolour.  I splattered more gold watercolour over my botanical panel as well.  The panel was cut to size and placed at the top right corner so the frame is only showing on the two sides.  The sentiment (AliExpress) is stamped in more Seedless Preserves distress ink, but I had to stamp several times to get a clean image which means that it's darker than I wanted.  The colours of the print are subtle, but so pretty and even better in real life.

This is not a CAS design but wanted to share with you.

------------------------------------------------


Marcia is our host.

Started with a basic gray card stock base (SU!).  Used the Christmas Wreaths stencil (STAMPlorations), off the page, sponging with the leaves with blending brushes in basic gray ink.  The berries were sponged in white pigment ink first, left to dry, then sponged again in Fired Brick distress ink.  Used a metallic silver pen to outline the leaves and berries.  Finished with a silver embossed sentiment (Art Deco Celebrate Christmas - Poppy Stamps - retired) and a few dots of white paint.

Close-up ... shows the silver outlining of the stenciled leaves and berries

------------------------------------------------

I hope you'll check out the challenge blogs to see the amazing cards from our Designers, Guest Designers, and participants.  If you haven't had time to play along, there's over a week left before both challenges close on 24th at midnight PST.  Come join us!


If you would like to subscribe by email,
please fill out the subscription form in the upper right sidebar.
It is also important to add sw1subscribers@gmail.com to your contact list
so Google recognizes the address and delivers the updates.


CAS Mix Up Reminder - Botanical Leaf (1)
Stamps:  For You (Cavallini & Co)
Paper: Mixed Media (Strathmore 140 lb.); Soft Suede card stock (SU! - retired)
Ink:  Gold Watercolour Concentrate (Blick Art Materials)
Accessories & Tools: sponges, splatter brush

CAS Mix Up Reminder - Botanical Leaf (2)
Stamps:  Beautiful (AliExpress)
Paper:  Watercolour (Arches 140 lb. Hot Press), Neenah white 110 lb. card stock
Ink:  Seedless Preserves Distress Ink (Tim Holtz); Gold Watercolour Concentrate (Blick Art Materials)
Accessories & Tools: sponges, splatter brush

CAS Christmas Reminder - Christmas Wreath
Stamps:  Art Deco Celebrate Christmas (Poppy Stamps - retired)
Paper:  Gray card stock (Stampin' Up!)
Ink:  Basic Gray dye ink (SU!); Unicorn (white) Pigment Ink (Hero Arts); Fired Brick distress ink (Tim Holtz); Versamark
Accessories & Tools:  Christmas Wreath stencil (STAMPlorations), blending brushes, Silver metallic pen (Pilot), Silver embossing powder, heat tool, White Posca pen


Challenges:
CAS Mix Up October Challenge - Botanical Prints
CAS Christmas October Challenge - Gray and Red

Tuesday, July 27, 2021

Poinsettias and Holly

Hi everyone.  I had two leftover stenciled poinsettia pieces in my stash, so used them on the above card.  The stenciling and sponging was all done I just added silver outlining to the images using a metallic pen.  Finished the card by adding a strip of silver metallic card stock to make a clean finish between the stencilled panel and my card base, and a silver heat embossed sentiment.  Always great when I can use up leftover pieces! :)  

Close-up ...
This view shows how shiny the silver outlining is on the stencilled panel. :)  For some reason, the sentiment doesn't look good but it does IRL.

I'm sending this card to a couple of challenges:


* * * * *
My sister is one of the people evacuated from her home due to wildfires.  She came down to the lower mainland last week with her hubby and two dogs.  They came by for a visit so I took a few photos to share.  Also happy to report the evacuation order was lifted a couple of days ago and they headed home today.


Tucker

Big size difference :)

Jessie loves her Auntie DeeDee


Challenges:


Wednesday, July 22, 2020

Smile!

Hi everyone.  One more stencil tracing card for the CAS Mix Up Challenge before it closes in 2 days.
You may recognize this stencil. :)  I used it for my reminder card.  It's one of my favourite large flower stencils.  This card looks totally different than my reminder card.  Changing up the colours of the flower and the colour of the pen for outlining makes a big difference

This is such a simple technique that gives a whole new look to the image.  Thanks for this fun challenge Nancy!!

Close-up ...
I hope you had time to try this technique.  As always, I'd love to see your cards in our gallery.  Hope to see you there!

Products
Bloom Stencil (Mayco) - Blick Art Materials


Stamps:  Smile (AliExpress)
Paper:  Mixed Media (Strathmore 140 lb.); White card stock (Neenah 110 lb.); Black card stock (SU!)
Ink:  Distress Inks:  Mustard Seed, Spiced Marmalade, Ripe Persimmon (Tim Holtz); Versamark
Accessories & Tools:  Bloom stencil (Mayco), sponges, Black Micropen, white embossing powder, heat tool

Challenges:
CAS Mix Up July Challenge - Stencil Tracing

Wednesday, July 01, 2020

CAS Mix Up July Challenge

Hi everyone.  Today is the start of the CAS Mix Up challenge for July and it's all about Stenciling!  Nancy (scandinancy creates) is our host and she wants us to do some stencil tracing.  Basically you do your stenciling, and then with the stencil back over the image, outline it using any pen colour you want ... or outline the stenciled design free-hand.
The above card starts with a bright yellow splashed background.  Click HERE to see my video on splash watercolouring.  The stencil image is from Silhouette America and it is cut with my Silhouette Cameo machine using a piece of acetate.  I sponged through the stencil and once dry, went over the stencil again with a coating of matte gel (clear).  It makes the colours more vibrant.  Outlining was a bit of an issue with the gel, so I ended up outlining around the outside of the gel, rather than using the stencil as a guide.  It worked well.  A black sentiment banner with white heat embossing finishes the card.

My card has Splash Watercoloured Background, Stenciling, Sponging, Embossing Gel, Stencil Tracing, and Heat Embossing.  Whew!  That's a lot on a card that is still CAS. :)

Close-up ...
We are so happy to have THREE Guest Designers this month.  Please check out the challenge blog to see Greta (GG Creations), Sandie (London Days), and Kia (Kia's Art Bits) wonderful Stencil Tracing cards and the lovely cards from the rest of our Designers.  I know you'll be inspired to give this a try!

Products
Birthday Blowout (sentiment) - Poppy Stamps
Poppy Field cut file - Silhouette America (Donna Downey)


Stamps:  Birthday Blowout (Poppy Stamps)
Paper:  Mixed Media (Strathmore 140 lb.); White card stock (Neenah 110 lb.); Black card stock (SU!)
Ink:  Distress Inks:  More Mustard, Spiced Marmalade, Ripe Persimmon, Peeled Paint, Wilted Violet (Tim Holtz); Versamark
Accessories & Tools:  Spring flowers stencil (cut wtih Cameo), acetate, sponges, Clear Matte Gel (Goldens), Black Micropen, White embossing powder, heat tool

Challenges:
CAS Mix Up July Challenge - Stencil Tracing


Friday, July 06, 2018

Lustrous Rose

Hi everyone.  A little while ago I had an day of play with my friends Susan and Christine.  Susan brought this image that she had just bought.  Isn't it pretty??!!

I stamped the image in soft tan colour ink so that I could no-line watercolour.  But it was hard to figure out how the petals were formed.  I used the photo of the watercoloured rose on it's packaging and just did a really quick bit of outlining with a fine black marker.  It made it so much easier for me to watercolour.  I used distress inks and a waterbrush.  Once it was done, I splattered with a bit of green ink and stamped the sentiment in black to tie it to the black outlining.

Here's a close-up ...


Stamps: Lustrous (Penny Black), Gratitude (Penny Black)
Paper:  Mixed media (Strathmore 140 lb)
Ink:  Distress Inks:  Ripe Persimmon, Picked Raspberry, Shabby Shutters, Peeled Paint (Tim Holtz)
Accessories & Tools:  Water brush, fine line black permanent marker, brush for splattering, white gel pen

Thursday, January 04, 2018

Holly for Merry Monday

Hi everyone.  Today I'm playing along with the first challenge of the year at Merry Monday (#271 - Embossing).  The challenge is being run by my dear friend Linda.


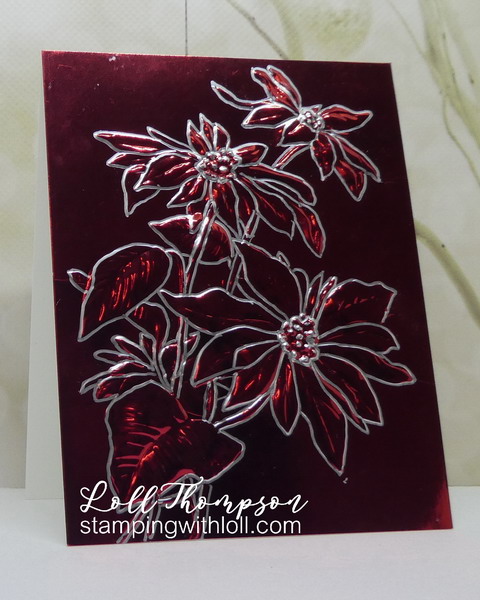
Dry embossing is something that I rarely use.  Not sure why ... I just completely forget about this wonderful technique that adds so much texture and dimension to cards.  I'm using some gifted dry embossed backgrounds that I've had for AGES!!  Thanks to my sweet friends Susan and Bonnie for providing the perfect backdrops for my watercoloured holly. :)

This holly is die-cut from hot press watercolour paper and watercoloured with distress inks.  A few details have been added with distress markers (veins in the leaves, outlining the berries).  I tried to leave a white spot on each berry, but somehow I managed to watercolour completely over top of a couple, so used a white gel pen to add the spots of white afterwards.  Happy with how it turned out.  I also diluted white acrylic paint to splatter over top to create the look of snow.  For the final touch, I stamped my black sentiment banner with white pigment ink and heat embossed with white embossing powder.

For the second card, it is mostly the same except I switched out the dry embossed background for falling snow, and used watercolour pencils to add details to my holly and berries.  The watercolour pencils give a subtle look and blend better than the distress markers.  Learned something new, which is always good.


* * * * *

Just a quick reminder about the
Starts on Jan. 10th!
See you there!


Stamps:  Christmas Messages (Hero Arts)
Paper:  White (Neenah 110 lb. card stock); Watercolour paper (Arches 140 lb. hot press); Black
Ink:  Distress Inks:  Twisted Citron, Mowed Lawn, Walnut Stain, Candy Apple, Fired Brick, Aged Mahogany (Tim Holtz); Derwent watercolour pencils
Accessories & Tools:  holly & berry branch die (Penny Black), water brush, white gel pen, white acrylic paint, paint brush for splattering, white embossing powder, heat tool, dry embossed background gifted from friends

Challenges:
Merry Monday #271 - Embossing