Showing posts with label watercolour spritz. Show all posts

Thursday, March 28, 2024

Cover Die Eclipse - Group of Seven

Hi everyone.  Today is the start of a new technique at Group of Seven.   Julia introduced us to this fabulous technique that is a twist on the Eclipse (or Camoflague) technique.

I had it in my head that I wanted to use a stencil, even though the technique calls for stamping a large image. :)  I made two stenciled card fronts using the lovely Sunflower stencil from Magenta, sponging with Distress Inks (Mustard Seed, Ripe Persimmon, Rusty Hinge, Mowed Lawn).  One was used at the base of the card front, the other was die-cut with a Hello Frame die (AliExpress).  I cut two more of the Hello Frame dies from white card stock and layered them with the stenciled one on top.  The final step was to glue the die-cut stack on top of my card front, lining up the images.  I'm so happy with how this turned out!! :)

Please check out the details for the technique and link to video on the blog ...
Here's what I learned when I experimented with this technique ...
  • Even though this is called Cover Die Eclipse, you don't have to use a Cover die.  You can use regular dies, or a mix of a few different dies to create your pattern.
  • You can use a stamp or stencil to create your design.  This makes the technique more versatile.
  • Patterned paper is also a great alternative to stamping an image.

Sending the sunflower card to Stencil Fun March Challenge.

* * * * *
For the card above, I used a large stamp (Pinecone Background - Simon Says Stamp), inking the image with shades of green and brown Distress Inks and spritzing with water before stamping.  I die-cut my top layer using a frame die (Sizzix - Rachel Bright) that was gifted to me many years ago.  The card is finished with a black stamped sentiment (Big Scripty Greetings Holiday - Simon Says Stamp - retired).

* * * * *
... and one more ...
This time I used patterned paper for this technique.  It worked great!  I used images from a set of papers from AliExpress.  There were two of each design ... one solid and one on vellum.  I used the vellum image for the background, layering a couple of die-cut white layers (I used a honeycomb corner die in the bottom right corner).  Then added the solid image for the top layer, also cut with the honeycomb corner die in the bottom right corner.  The image comes outlined with gold, so I simply added a gold metallic die-cut sentiment (Happy Birthday Friendship Script- Memory Box) to complete the card. :)

Thanks for stopping by!

Card #1:
Stamps:  n/a
Paper:   White card stock (Neenah 110 lb.)
Ink:   Distress Inks:  Mustard Seed, Ripe Persimmon, Rusty Hinge, Mowed Lawn (Tim Holtz)
Accessories:  Sunflower stencil (Magenta), sponge brushes, Hello Frame die (AliExpress), white Posca pen 

Card #2:
Stamps:  Pinecone Background (Simon Says Stamp); Big Scripty Greetings Holiday (Simon Says Stamp)
Paper:   White card stock (Neenah 110 lb.); Mixed Media Paper (Fabriano 108 lb.)
Ink:   Distress Inks:  Shabby Shutters, Peeled Paint, Gathered Twigs (Tim Holtz); Black pigment ink (Obsidian - Altenew)
Accessories:  Water mister, Sizzix frame die (Rachel Bright), 

Card #3:
Stamps:  n/a
Paper:   White card stock (Neenah 110 lb.); Patterned Paper from AliExpress; Gold metallic paper (SU!)
Ink:   n/a
Accessories:  Honeycomb corner die (unknown); Happy Birthday Friendship Script die (Memory Box)

Thursday, January 11, 2024

Guest Designing for Seize the Birthday!

Hi everyone.  I'm so happy to be back as the Surprise Party Guest for Seize the Birthday again this month.  


Today starts the first challenge of 2024 with a choice of options (Embossing Wet or Dry) - Challenge #275.  I made two cards (the one above with dry embossing, and a second card with wet embossing).

The card above uses the Perfect Peonies from Clearly Besotted.  I stamped the image in black ink and heat embossed with clear before watercolouring using Distress Inks (Kitsch Flamingo, Picked Raspberry, Shabby Shutters, Peeled Paint, Mustard Seed).  I placed the peonies on a layer of pink card stock, covered with a dry embossed vellum piece I received in the Christmas card from my friend Leslie.  It was so pretty, I had to use it right away! :)  Thank you Leslie!  I finished the card by adding a simple Happy Birthday sentiment stamped in black.

I'm sending the above card to the Triple B (Birds, Butterflies, & Blooms January Challenge.  They have provided a mood board for inspiration.  My flowers are pink and the layer of embossed vellum (sort of) looks like snow. :)

... and then ....

This card is done using "Wet Embossing" and my very favourite embossing gel, Glass Bead (Golden).  I used the Leaves stencil from Simon Says Stamp, sponged with Distress Inks (Peacock Feathers, Mowed Lawn, Rustic Wilderness).  I removed the stencil and cleaned off the ink before placing it back over top to add a layer of glass bead gel.  I love the sparkle from this amazing product.  I kept the card design CAS (clean and simple) so that the beautiful leaves were the star, simply adding a sentiment to finish.

I hope you'll join us with your Happy Birthday card(s).  As always, Anything Birthday goes with optional theme.  Hope to see you in the gallery!

I'm sending the above card to Stencil Fun January Challenge - where it's always Anything Stenciling Goes with optional theme.  I went with the Anything stenciling this time. :)

... and I'm also sending this card to Simply Clean & Simple January Challenge - Anything CAS Goes.

Thanks for stopping by!

Card #1:
Stamps:  Perfect Peonies (Clearly Besotted); Greetings (Cavallini & Co)
Paper:   White card stock (Neenah 110 lb.); Mixed Media (Strathmore 140 lb.); Pink Pirouette card stock (SU!)
Ink:   Obsidian Black Pigment Ink (Altenew); Distress Inks:  Kitsch Flamingo, Picked Raspberry, Shabby Shutters, Peeled Paint, Mustard Seed (Tim Holtz)
Accessories:   Dry embossed vellum (gift from a friend), clear embossing powder (Ranger), heat tool

Card #2:
Stamps:  Brushed Wishes (Stampendous)
Paper:   White card stock (Neenah 110 lb.)
Ink:   Distress Inks:  Peacock Feathers, Mowed Lawn, Rustic Wilderness (Tim Holtz)
Accessories:   Leaves Stencil (Simon Says Stamp), sponge brushes, Glass Bead Gel (Golden), palette knife


Friday, January 05, 2024

Watercolouring with Dry Embossing

Hi everyone.  I follow Heather Telford's blog, an amazing artist and card maker.  Recently she has made some beautiful watercoloured cards and added dry embossing over top when she is done.  So cool!  I had to give it a try. 

I did the watercolour spritz technique for the Full Bloom image (Penny Black), using Distress Inks .  This means using water soluable markers to colour direct to stamp, misting with water and then stamping on to water-friendly card stock (I used mixed media).  It really does give your cards a true watercolour look.  Once my image was dry, I ran the card front through my embossing machine with the Leafy Branch embossing folder - retired (Cuttlebug).  I love how it adds some wonderful texture to the background.  To finish, I added a simple white sentiment border stamped using a retired SU! stamp set.

Close-up ...

I'm sending this card to the Can You Handle the Pressure Challenge - Anything Goes Embossing with a twist of Winter.  I opted out of the twist this time ...

Edit to add:  Adding this card to the Simply Clean & Simple January Challenge as well.  

Thanks for stopping by!


If you would like to subscribe by email,
please fill out the subscription form in the upper right sidebar.
Make sure to add "subscribe" to the message.
It is also important to add SWL1subscribers@gmail.com to your contact list
so Google recognizes the address and delivers the updates.

To unsubscribe, please use the same form making sure to add
"unsubscribe" to the message.
Thank you.


Stamps:  Full Bloom (Penny Black); Endless Birthday Wishes - retired (Stampin' Up!)
Paper:   White card stock (Neenah 110 lb.); Mixed Media (Strathmore 140 lb.)
Ink:   Wilted Violet, Villianous Potion, Mowed Lawn, Rustic Wilderness (Tim Holtz)
Accessories:   water mister, Leafy Branch embossing folder (Cuttlebug)

Saturday, December 24, 2022

Full Bloom

Hi everyone.   Today is my final post for this year.  

I am using my favourite technique that I learned this year from the very talented Chrissie Stokes.  I followed Chrissie's second video, using a single stamp to create my design, inked with Stampin' Up! markers.  The image is Full Bloom (Penny Black) and even though it's not technically a Christmas stamp, I think it works really well to make a Christmas card.  This is my most favourite Christmas card I've made this year and I sent it to a very dear friend. :)

To finish, I die-cut two rectangle frames, sandwiching them with the vellum.  I then added foam strips to the back to pop the framed piece up off the card base.  I stamped the sentiment (Christmas Sentiments from Penny Black) using the same red marker.

Stamping on both sides of the vellum gives the illusion the coloured leaves are recessed in the background.  It's such a creative and clever technique. :)

Close-up ...

I made a quick second card using the same technique, image and inks ..
Thank you to all that visit my blog.  A special thank you to those that take the time to leave me messages of support.  I truly appreciate your visits.  Wishing you the most fabulous Christmas!

See you in 2023!

If you would like to subscribe by email,
please fill out the subscription form in the upper right sidebar.
Make sure to add "subscribe" to the message.
It is also important to add SWL1subscribers@gmail.com to your contact list
so Google recognizes the address and delivers the updates.

To unsubscribe, please use the same form making sure to add
"unsubscribe" to the message.
Thank you.


Stamps:  Full Bloom (Penny Black); Christmas Sentiments (Penny Black)
Paper:   White card stock (Neenah 110 lb.); Vellum (unknown)
Ink:   White Pigment ink (Hero Arts Unicorn); Markers in Real Red and Gumball Green (Stampin' Up!)
Accessories:  White embossing powder, heat tool, Rectangle dies - retired (Spellbinders)  

Challenges:

Friday, December 16, 2022

Snowglobe

Hi everyone.  

I bought this Snow Globe die (Honey Bee) last year and only used it once to create a shaker card.  This time, I created a winter scene inside my snowglobe.  

I started by stamping Scenic Season - retired (Stampin' Up!).  I've had this stamp set for probably 20 years and never get tired of it. :)  I inked with Mowed Lawn distress ink on the trees and then used a sponge dauber to dab on some darker green (Rustic Wilderness).  I spritzed with water before stamping, then blotted the excess water and stamped again.  I added some Candied Apple distress ink for the bird and then sponged the sky with Broken China distress ink.

I tore some snowhills from my white card stock, adding glitter to the torn edges.  For the snow scene, I first splattered with white ink and then heat embossed Chunky White Frantage.  I sprinkled more glitter on top and reheated the Frantage to hold the glitter.  To finish, I added the frame from black card stock, heat embossing the sentiment in white and lined with acetate.

Thanks for stopping by!


If you would like to subscribe by email,
please fill out the subscription form in the upper right sidebar.
Make sure to add "subscribe" to the message.
It is also important to add sw1subscribers@gmail.com to your contact list
so Google recognizes the address and delivers the updates.

To unsubscribe, please use the same form making sure to add
"unsubscribe" to the message.
Thank you.


Stamps:  Scenic Season - retired (Stampin' Up!)
Paper:   White card stock (Neenah 110 lb.); Mixed Media paper (Strathmore 140 lb.); Black card stock (SU!)
Ink:  Distress Inks:  Mowed Lawn, Rustic Wilderness, Candied Apple, Broken China (Tim Holtz); White Pigment ink 
Accessories:   Snow Globe die (Honey Bee), water mister, sponge brush, white acrylic paint, splatter brush, Chunky White Frantage (Stampendous), glitter (SU!), white embossing powder (Ranger), heat tool


Monday, December 05, 2022

Peace, Love and Joy

Hi everyone.  

I'm happy to say that I have my Christmas cards done and mailed. :)  I'm sharing one that I made a short while ago using two beautiful holly stamps from Penny Black (Brillance).  I used the marker watercolour spritz technique, using SU!'s markers this time in Always Artichoke and Cherry Cobbler.  I found the SU! ink gives a more watercoloured, rustic look from using distress inks.

I added one colour at a time to the two sprigs of holly, lightly spritzed with water and then stamped onto a piece of mixed media paper.  I used a small brush to move some of the wet ink around until I was happy with the look. 

Once dry, I stamped the sentiment (Christmas Sentiments - Penny Black) in more of the cherry cobbler ink.  To finish, I used my white acrylic pen to add some highlights to the berries.

Close-up ...
I'm sending this card to the Penny Black Saturday December Challenge.
Thanks for stopping by!


If you would like to subscribe by email,
please fill out the subscription form in the upper right sidebar.
Make sure to add "subscribe" to the message.
It is also important to add SWL1subscribers@gmail.com to your contact list
so Google recognizes the address and delivers the updates.

To unsubscribe, please use the same form making sure to add
"unsubscribe" to the message.
Thank you.


Stamps:  Brillance (Penny Black); Christmas Sentiments (Penny Black)
Paper:   White card stock (Neenah 110 lb.); Mixed Media paper (Strathmore 140 lb.)
Ink:   SU! markers:  Always Artichoke, Cherry Cobbler
Accessories:   fine water mister, small w/c paint brush, white acrylic pen (Posca)

Challenges:

Sunday, November 20, 2022

Penny Black - Berry Bouquet

Hi everyone.  Sharing another wonderful stamp (Berry Bouquet 40-860), from the Penny Black Christmas release.

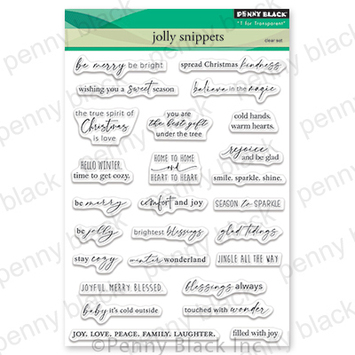
I love this sweet vase filled with berry branches.  I kept the design very CAS by inking up the whole image with Brushed Corduroy distress ink.  More distress ink was added to the vase portion ... this time Gathered Twigs, before spritzing with a light mist of water and stamping onto my mixed media card front.  A wet paint brush was used to move some of the colour around on the vase.  I then inked up the berries with a marker (Stampin' Up's! Real Red marker).  I spritzed lightly again with water and stamped onto my mixed media card front; then left it to dry naturally.  The red mixed with the brushed corduroy ink to create lovely, deep coloured berries.  The sentiment (Jolly Snippets 30-925) is stamped in the same SU! real red ink.  To finish, I used my white acrylic pen to add dots to the berries.

Close-up ...
I'm sending this over to the Merry Little Christmas Challenge #47 - Anything Christmas Goes ...


Penny Black Products


Thanks for stopping by!


If you would like to subscribe by email,
please fill out the subscription form in the upper right sidebar.
Make sure to add "subscribe" to the message.
It is also important to add SWL1subscribers@gmail.com to your contact list
so Google recognizes the address and delivers the updates.

To unsubscribe, please use the same form making sure to add
"unsubscribe" to the message.
Thank you.


Stamps:  Berry Bouquet; Jolly Snippets (both Penny Black)
Paper:   White card stock (Neenah 110 lb.); Mixed Media paper (Strathmore 140 lb.)
Ink:   Distress Inks:  Brushed Corduroy, Gathered Twigs (Tim Holtz); Real Red (Stampin' Up!)
Accessories:   water mister, white acrylic pen (Posca)

Challenges:

Monday, November 07, 2022

Penny Black - Winter Gem

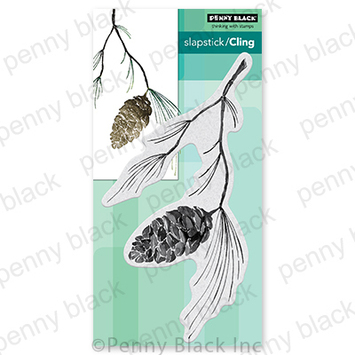
Hi everyone.  LOVE this beautiful pinecone and pine needles image (Winter Gem 40-857) from the Penny Black Christmas Release.

I inked up the image with distress inks (evergreen bough, pine needles, rustic wilderness, gathered twigs, walnut stain) and then lightly blotted once with paper towel.  Used a mini mister to add a fine spray of water over top and stamped onto a piece of mixed media paper, then blotted up any excess ink.  This created a soft background pinecone and needles.  I moved my image and reinked the stamp again in the same colours of distress inks.  This time I did not blot with paper towel.  I sprayed a fine mist of water and then stamped over top of the other image.  I left it to dry naturally.  This creates depth with the two layers of pinecones.  

To finish, I stamped the sentiment (Jolly Snippets 30-925) in gathered twigs distress ink three times to get the depth of colour I wanted.  I finished the card by splattering with diluted white gouache paint for falling snow.

Close-up ...

Thanks for stopping by!


Penny Black Products

If you would like to subscribe by email,
please fill out the subscription form in the upper right sidebar.
Make sure to add "subscribe" to the message.
It is also important to add SWL1subscribers@gmail.com to your contact list
so Google recognizes the address and delivers the updates.

To unsubscribe, please use the same form making sure to add
"unsubscribe" to the message.
Thank you.


Stamps:  Winter Gem; Jolly Snippets (both Penny Black)
Paper:   White card stock (Neenah 110 lb.); Mixed Media paper (Strathmore 140 lb.)
Ink:   Distress inks:  Evergreen Bough, Pine Needles, Rustic Wilderness, Gathered Twigs, Walnut Stain (Tim Holtz)
Accessories:   White Gouache Paint (Arteza), splatter paint brush

Challenges:


Saturday, November 28, 2020

Happy Birthday Susan!

My dear friend, Susan (Cardmaker's Garret) is celebrating a milestone birthday today.  I would like to celebrate along with her and hope that you do too!

HAPPY 70th BIRTHDAY SUSAN!!!

There is a linky birthday party below to honour Susan, which will be open for two weeks.  Please help make this a special day for Susan by joining in and sharing a birthday card for her.

I needed to make a second birthday card for her because I forgot to take a photo of the card I mailed Susan over a week ago, duh! :)  Seems like I do these kind of things more often now ... I'm blaming Covid, not the fact that I'm getting older. :)

Susan, I hope you enjoy this card just as much as the one I mailed to you!  I'll be sending the above card to you as well!


Susan's Linky Birthday Party is closed!

Wednesday, September 23, 2020

Watercolour stamp sets

Hi everyone.  I haven't bought many stamp sets from Stampin' Up! for a long time, but when I saw the latest catalogue ... WOW!  Lots of watercoloured-looking stamp sets.  A lot of the work is already done ... just add ink! :)

Today is an amazing set called Beautiful Friendship.  All I did was ink up the stamp with three shades of blue (one at a time, spritzing, stamping and blotting with paper towel after each addition), working lightest to darkest inks.  This was my first time trying this stamp and this CAS design was done in about 10 minutes.  You gotta love that!

Close-up ...
The sentiment is from the same stamp set.  I first stamped it in green, but it looked too washed out.  Overstamped in black, which is a LOT of contrast.  Might have been better with a soft gray or dark blue. :) Oh well, next time. :)

Since this is new to me, I'm adding it to the NBUS #18 gallery ...


Stamps:  Beautiful Friendship (Stampin' Up!)
Paper:  Mixed Media (Strathmore 140 lb.)
Ink:  Distress Inks:  Tumbled Glass, Broken China, Salty Ocean, Shabby Shutters (Tim Holtz); Black (Memento)
Accessories & Tools:  Water mister

Challenges:
NBUS #18 Challenge

Tuesday, September 15, 2020

CAS Challenges September Reminder

Hi everyone.  We are half way through the month of September.  Today I'm sharing reminder cards for both CAS challenges.  First up, CAS Mix Up September Challenge - Embossing with Dies.

Joanna is our host.

I die-cut this lovely poppy Bodacious die (Penny Black) from watercolour paper and coloured with distress inks.  I then used the same die to emboss the poppy on my card front.  This give some dimension to the card.  I used Wink of Stella to add lots of sparkle to the poppies.  I didn't realize that I used the same sentiment (also done on black banner with white embossing) as I did for my CMU launch card on the 1st. :)

This is a fun way to stretch the use of your dies.  Thanks to Jo for a great challenge!

------------------------------------------------


Colleen is our host.

Here's the reminder card for CAS Christmas challenge - Christmas trees.  I used a large Christmas Glow (Penny Black) stamp off the edge of the page to keep some white space on my card.  I inked with distress inks,spritzed with water and stamped.  Repeated until I was happy with the results.  Once dry, I added a little shading with a medium green coloured pencil.  The sentiment in red finishes this CAS design.

------------------------------------------------

I hope you'll check out the challenge blogs to see the amazing cards from our Designers, Guest Designers, and participants.  If you haven't had time to play along, there's over a week left before both challenges close on 24th at midnight PST.  Come join us!


CAS Mix Up Reminder - Handmade with Love
Stamps:  Happy Snippets (Penny Black)
Paper:  Watercolour paper (Arches 140 lb. cold press); White card base (Neenah 110 lb.); Black card stock (SU!)
Ink:  Distress Inks:  Picked Raspberry, Pine Needles (Tim Holtz); Versamark
Accessories & Tools: Bodacious die (Penny Black), water brush, white embossing powder, heat tool, Clear Wink of Stella


CAS Christmas Reminder - Oh, Christmas Tree
Stamps:  Christmas Glow (Penny Black); Sentiment - Love Bug Christmas (Unity Stamps)
Paper:  Mixed Media paper (Strathmore 140 lb.)
Ink:  Distress Inks:  Twisted Citron, Mowed Lawn, Mustard Seed (Tim Holtz); Real Red (Stampin' Up!)
Accessories & Tools:  water mister, Green coloured pencil (Prismacolor)


Challenges:
CAS Mix Up - Embossing with Dies
CAS Christmas - Christmas Tree