Showing posts with label stencil monoprint. Show all posts

Monday, October 14, 2024

More Stencil Monoprint for Gof7

Hi everyone.  Another card for Group of Seven's Stencil Monoprint technique.
I used a lovely stencil called Layered Poinsettia from Tim Holtz.  I pressed two colours of Distress Ink pads directly only the stencil (Brushed Corduroy, Candied Apple).  Spritzed with water and flipped the wet stencil onto a piece of mixed media paper.  Used a paper towel to blot over the stencil to remove the ink that escapes from the open design.  I ended up with a piece that has the background of the stencil images coloured.  I let it dry thoroughly and then placed the cleaned stencil back over top, lining up the design.  I added embossing paste over top, using a palette knife to smooth it out.  I removed the stencil right away and washed it off.  The piece was left to dry.

I finished be adhering the panel to my white card base and attaching a lovely gold foiled sentiment (gift from a friend).  

Close-up ...
Sending this card to Peace on Earth Challenge #73 - Anything Christmas Goes.
Thanks for stopping by!

Stamps:  n/a
Paper:   White card stock (Neenah 110 lb.); Mixed Media (Strathmore 140 lb.)
Ink:   Distress Ink pads:  Brushed Corduroy, Candied Apple (Tim Holtz)
Accessories:   Layered Poinsettia Stencil (Tim Holtz), water mister, White embossing paste (Dreamweaver), palette knife, Foiled sentiment (unknown)

Saturday, September 28, 2024

Stencil Monoprint - Group of Seven

Hi everyone.  This month we are looking back at an older technique, Stencil Monoprint.  It's an easy and fun technique that creates lovely backgrounds or main panels for cards.

Please check out the details for the technique and link to videos on the blog ...

* * * * *
My first card above uses powdered inks (Brushos - Terra Cotta, Orange, Leaf Green, Light Brown).  Using powdered inks or sprays allows me to make a positive (print) and negative (monoprint) from just one application of colour (see pictorial below).  I used one of my favourite stencils (Joyful Sunflower - The Crafter's Workshop), which was a gift from a sweet friend several years ago.  I'll share my print card at another time. 

Sending the above card to Just Us Girls #746 - Stencil Week.

* * * * *
For my second card, I used powdered inks again (Brushos - Lime Green, Leaf Green), along with the Wander & Find stencil (Carta Bella - retired).
I stamped the Pop Sunflower image onto mixed media paper, watercoloured using Distress Inks, fussy-cut, and popped it up over my Stencil Monoprint background.  That little bird is so sweet! :)


* * * * *
Here is a pictorial of my process of making the Stencil monoprints with powdered inks.
 
   1) Stencil on mixed media paper        2) Brushos sprinkled over stencil

 
                            3) Right card - Water misted over      4) Left card - Inky stencil flipped onto
                                 Brushos (positive print)                       second card / blotted with
                                                                                                     paper towel  (stencil monoprint)                    
 
                                  5)  Stencil removed                               6) Left to Right - 
                                       / paper left to air dry                            Stencil monoprint/ Print
                                       (finished Stencil Monoprint)             

Here's what I learned when I experimented with this technique ...
  • This is an easy technique that works with lots of different mediums, substrates, and stencils. 
  • It can be a main panel or background - so lots of flexibility
  • Use a generous amount of water so the colour spreads, especially when using powdered inks.
  • Important to remove the stencil quickly after spraying with water.  This prevents the water from spreading under the stencil and loosing definition of the design.
  • You can create several panels with one application of ink.  Repeat adding inked (wet) stencil onto card and blotting with paper towel until there isn't any colour left.  First stencil monoprint will be the strongest colours, each monoprint will be lighter in colour than the previous.

Thanks for stopping by!

Card #1:
Stamps:  Pop Sunflowers (Stampendous); Simply Sentiments (Lawn Fawn)
Paper:   White card stock (Neenah 110 lb.); Mixed Media (Strathmore 140 lb.); Early Espresso (SU!)
Ink:   Brushos: Terra Cotta, Orange, Leaf Green, Light Brown; Versamark
Accessories:   Clear acrylic block to elevate panel when adding stencil and ink (optional - but worth it), Mini Joyful Sunflower stencil (The Crafter's Workshop); Water Mister, White embossing powder (Ranger); heat tool

Card #2:
Stamps:  Many Everyday Messages (Hero Arts - retired)
Paper:   White card stock (Neenah 110 lb.); Mixed Media (Strathmore 140 lb.)
Ink:   Black Pigment: Versafine Clair Nocturne; Brushos: Lime Green, Leaf Green; Distress Inks:  Mustard Seed, Spiced Marmalade, Ripe Persimmon, Gathered Twigs, Mowed Lawn (Tim Holtz)
Accessories:   Clear acrylic block to elevate panel when adding stencil and ink (optional - but worth it),

Thursday, November 23, 2023

Guesting at Seize the Birthday!

Hi everyone.  I'm back with my second card this month as Surprise Party Guest at Seize the Birthday Challenge #274 - Fall Items (Food, Flowers, Leaves).
 

Fall is my favourite time of year.  I just LOVE the colours of the fall flowers and the changing leaves.  Today I've used Beautiful Bouquet Dahlia from WPlus9 (retired).  My great uncle used to have a field of dahlias on his property.  They were so beautiful and I have loved that flower since I was a little girl. :)

I stamped the image in black and heat embossed in clear over a stencil monoprint background using the Mini Tiny Circles stencil from The Crafter's Workshop.  The background is done with Peeled Paint distress ink and I've used more distress inks to watercolour the bouquet (Seedless Preserves, Forest Moss, Mustard Seed, Ripe Persimmon).

The card front is cut with a circle aperture for the bouquet to peek through.  This creates a CAS mixed media design, which is finished with a simple sentiment (Endless Birthday Wishes by Stampin' Up! - retired).  

I'm sending the above card to Stencil Fun November Challenge (3rd entry!).

Close-up ...
Come join the challenge at Seize the Birthday with your fall season birthday cards.  Hope to see you in the gallery!

Thanks for stopping by!


If you would like to subscribe by email,
please fill out the subscription form in the upper right sidebar.
Make sure to add "subscribe" to the message.
It is also important to add SWL1subscribers@gmail.com to your contact list
so Google recognizes the address and delivers the updates.

To unsubscribe, please use the same form making sure to add
"unsubscribe" to the message.
Thank you.


Stamps:  Beautiful Bouquet Dahlia (WPlus9 - retired); Endless Birthday Wishes (SU! - retired)
Paper:   White card stock (Neenah 110 lb.); Mixed Media (Strathmore 140 lb.)
Ink:   Black (Memento); Distress Inks:  Peeled Paint, Forest Moss, Seedless Preserves, Mustard Seed, Ripe Persimmon (Tim Holtz)
Accessories:   Mini Tiny Circles Stencil (The Crafter's Workshop), Clear embossing powder (Ranger), heat tool, watercolour brushes, Circle Nestability (retired - Spellbinders)

Saturday, February 18, 2023

Watercolour Foliage

Hi everyone.   I made this card a while ago, but just getting around to posting.  This is done with the stencil monoprint technique and watercolouring.

I started with the Leaves stencil (Simon Says Stamp), sprinkling orange and terracotta Brushos over top of the stencil, spritzing with a fine mist of water before turning it over and pressing it down over top of a piece of hot press watercolour paper.  I kept pressing with a paper towel to mop up any moisture that popped out from under the stencil.  I ended up with a lovely background with the leaf design fairly clear of colour (stencil monoprint).

Once dry, I used Mowed Lawn distress ink to watercolour my leaves and stems.  I went over them a few times on the w/c paper and it didn't pill - yay!  Once the leaves were dry, I used my white Posca pen to outline the image and add some veins to the leaves.  I cropped the image, added a thin white frame and popped it up over my card front with a sentiment (Happy Snippets - Penny Black) stamped underneath.  I used Carved Pumpkin distress ink and stamped the sentiment over and over (3 times) and then added a final stamping with Ripe Persimmon distress ink.  I thnk the colour ended up looking like it was done with the same colours as the background. :)

Close-up ...

Edited to add:  I've included a link to a wonderful video by Lee-Anne Cross on how to do stencil monoprints.  Thanks for the prompt from Diane to include a link! :)


I'm sending this card over to February Stencil Fun Challenge - didn't use the optional theme this month.


Thanks for stopping by!


If you would like to subscribe by email,
please fill out the subscription form in the upper right sidebar.
Make sure to add "subscribe" to the message.
It is also important to add sw1subscribers@gmail.com to your contact list
so Google recognizes the address and delivers the updates.

To unsubscribe, please use the same form making sure to add
"unsubscribe" to the message.
Thank you.


Stamps:  Happy Snippets (Penny Black)
Paper:   White card stock (Neenah 110 lb.); Hot Press Watercolour Paper (Strathmore 140 lb.)
Ink:   Brushos:  Orange, Terracotta; Distress Inks:  Mowed Lawn, Carved Pumpkin, Ripe Persimmon (Tim Holtz)
Accessories:   Leaves Stencil (Simon Says Stamp); water mister, paint brushes, white Posca pen

Challenges:


Monday, November 28, 2022

Happy Birthday Susan!

Hi everyone.  Today is Susan's birthday (Cardmaker's Garret) ... my dear friend that I've known for over 10 years.  We met on-line through a stamping forum and found out that we only lived about 1/2 hour drive away from each other.  We've been meeting up in person (and online with Zoom calls during COVID) ever since. :)

Susan's favourite colour is blue, so I watercoloured some blue flowers using Distress Inks Salty Ocean and Unchartered Mariner.  LOVE the Mariner colour!.  The background is a stencil monoprint of one of my favourite stencils, Mini Tiny Dots.  It's especially good used in a monoprint.  I stamped the image in black ink and heat embossed with clear embossing powder before watercolouring.

Card inside ...
Susan, I hope you have the most lovely day, my friend!  xx

I'm sending this card to the Seize the Birthday Challenge #252.  Didn't do the Topping this time ...


And, I'm also sending this card to the Stencil Fun November Challenge.  This is my third entry this month! :)


If you would like to subscribe by email,
please fill out the subscription form in the upper right sidebar.
Make sure to add "subscribe" to the message.
It is also important to add SWL1subscribers@gmail.com to your contact list
so Google recognizes the address and delivers the updates.

To unsubscribe, please use the same form making sure to add
"unsubscribe" to the message.
Thank you.


Stamps:  Bouquet of Thanks (Simon Says Stamp); Good Wishes (Penny Black); Gratitude (Penny Black)
Paper:   White card stock (Neenah 110 lb.); Mixed Media paper (Strathmore 140 lb.); Black card stock (SU!)
Ink:   Black (Memento); Distress Inks:  Mowed Lawn, Salty Ocean, Unchartered Mariner (Tim Holtz); Versamark
Accessories:   Mini Tiny Circles stencil (Crafter's Workshop), Clear embossing powder, heat tool, 

Challenges:


Thursday, August 25, 2022

Snowflake

Hi everyone.  Today's card is for the Rudolph Days August Challenge - Anything Christmas Goes. 

I'm sharing a card made from my stash of card fronts.  Over the years I have made several card fronts when crafting with friends (in-person or on-line).  I have been inspired by my sweet friend, Bonnie (Stamping with Klass) to finally make these card fronts into cards. :)  She has been working for months going through her box of unused items and has made so many amazing cards.  Thanks for inspiring me, Bonnie! :)

The card above was made using the stenciling monprint technique (ink'ing the stencil background (acetate cut with my Silhouette Cameo), spritzing with water, turning it over onto a piece of mixed media paper).  It's a great way to stretch the use of your stencils by getting a negative image.  You need to blot with paper towel to absorb any stray ink so that the stencil image is clean and shows the colour of your card front.  I used magicals to make this background ... you can see all the variations of colours.  Once dry, I used a permanent silver pen (Pilot) to outline the snowflake.  The panel is popped up on foam for added dimension and the sentiment Christmas Sentiments (Penny Black) is silver heat embossed on my card base.

Close-up ...
You can see the shimmer from the magicals in this photo, along with the shine from the silver pen.

Thanks for stopping by!


If you would like to subscribe by email,
please fill out the subscription form in the upper right sidebar.
Make sure to add "subscribe" to the message.
It is also important to add SWL1subscribers@gmail.com to your contact list
so Google recognizes the address and delivers the updates.

To unsubscribe, please use the same form making sure to add
"unsubscribe" to the message.
Thank you.


Stamps:  Christmas Sentiments (Penny Black)
Paper:   White card stock (Neenah 110 lb.); Mixed Media paper (Strathmore 140 lb.)
Ink:   Magicals (Lindy's); Versamark
Accessories:   Snowflake stencil (cut file from Silhouette America), acetate sheet, Silhouette Cameo, water mister, silver pen (Pilot), silver embossing powder (Ranger), heat tool

Challenges:
Rudolph Days August Challenge - Anything Christmas Goes


Sunday, July 10, 2022

Penny Black - Courier

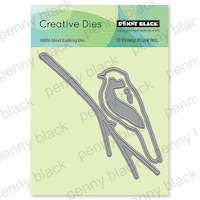
Hi everyone.  Today I'm sharing a card using the new die from Penny Black - Courier (51-734).  I've also used one of the new stamps from the So Thankful set (30-914), masking off a bit to have a simple "Thanks".

Before I created the bird on the branch, I worked on the background.  This is a stencil monoprint of the Penny Black Promenade stencil (25-001), which I've had for ages. :)  For the stencil monoprint, I randomly pressed two colours of distress inks (Peeled Paint, Chipped Sapphire) onto the stencil; spritzed with water and then flipped the wet side of the inky stencil onto a piece of mixed media paper.  I blotted with paper towel (which keeps the cutout of the stencil design clean white), leaving the background with lots of colour.  This is my favourite stencil technique. :)  

Blotting all the excess ink and water created a soft, dreamy looking leavy background for my lovely bird on a branch die, which I sponged with more Chipped Sapphire distress ink on the bird's body, along with two shades of brown ink for the branch.  I die-cut a second bird, using just the wing to glue on top of my bird to add dimension.

Close-up ...
Thanks for stopping by!

Penny Black Products


If you would like to subscribe by email,
please fill out the subscription form in the upper right sidebar.
Make sure to add "subscribe" to the message.
It is also important to add SWL1subscribers@gmail.com to your contact list
so Google recognizes the address and delivers the updates.

To unsubscribe, please use the same form making sure to add
"unsubscribe" to the message.
Thank you.


Stamps:  So Thankful (Penny Black)
Paper:   White card stock (Neenah 110 lb.); Mixed Media paper (Strathmore 140 lb.)
Ink:   Distress Inks:  Peeled Paint, Chipped Sapphire (Tim Holtz)
Accessories:   Promenade stencil (Penny Black); Courier die (Penny Black)

Monday, November 15, 2021

CAS Challenges November Reminder

Hi everyone.  Time for the reminder cards for the current CAS Challenges.  These are the last of the CAS Challenges for 2021.  Thanks to all who played along and supported us this year!  We appreciate YOU!


I'm your host.

This time I've added some crackle paste over top of my monoprint.  I used the Flower stencil from Mayco (retired) to create a large flower image with the background coloured with Lindy's Magicals.  Monoprints are the perfect opportunity to add paste to the white image that is left, with no ink, there is no bleed into the paste.  It keeps it clean and white.  To keep my card CAS, I cut down the flower print and just used over 1/4 of the original design.

I added a thin frame of black and then stamped the sentiment in black to pull it all together, Lawn Fawn's Simply Sentiments.

Close-up ...


------------------------------------------------


Here is my final card for the CAS Christmas challenge for 2021.

Barb is our host.

I used a sweet Christmas critter from Penny Black called Hopping by (30-626).  I stamped in black ink onto mixed media paper and heat embossed with clear embossing powder.  Then I watercoloured the image with distress inks.  Once dry, I used the matching die, Hopping cut out (51-577) to cut it out.  I set it aside.

Sponged the background of my card front using Evergreen Bough distress ink.  Took another piece of white card and tore it to create a snowhill and glued it in place.  Splattered the sponged background with water and then with diluted white gouache paint (also splattered the paint on the bunny).  Used Hickory Smoke distress ink to watercolour some shadows in the snow and then winked them with Clear Wink of Stella.  Used the same clear WOS to add shine to the ribbons and bow on the presents.  

Stamped the sentiment (Christmas sentiments 30- 504) in black and heat embossed in clear to match the image.  Finish the card by adding a 1/4" satin red ribbon tied in a knot near the top.  Haven't used ribbon for AGES!

Close-up ...

------------------------------------------------

I hope you'll check out the challenge blogs to see the amazing cards from our Designers, Guest Designers, and participants.  If you haven't had time to play along, there's over a week left before both challenges close on 24th at midnight PST.  Come join us!


If you would like to subscribe by email,
please fill out the subscription form in the upper right sidebar.
It is also important to add sw1subscribers@gmail.com to your contact list
so Google recognizes the address and delivers the updates.


CAS Mix Up Reminder - Just for You
Stamps:  Simply Sentiments (Lawn Fawn)
Paper:  Mixed Media (Strathmore 140 lb.); White card base (Neenah 110 lb.); Black card stock (SU!)
Ink:  Black (Memento)
Accessories & Tools:  Flower Stencil (Mayco - retired), water mister, Magicals (Lindy's Stamp Gang), Crackle Paste (Liquitex), palette knife


CAS Christmas Reminder - Hopping By
Stamps:  Hopping By; Christmas Sentiments (both from Penny Black)
Paper:  Mixed Media (Strathmore 140 lb.); White card stock (Neenah 110 lb.)
Ink:  Black (Memento); Distress Inks:  Evergreen Bough, Brushed Corduroy, Gathered Twigs, Candied Apple, Aged Mahogany, Antique Linen, Hickory Smoke (Tim Holtz)
Accessories & Tools:  Clear embossing powder, heat tool, paint brushes, splatter brush, Clear Wink of Stella, White Posca pen, red chalk, 1/4" red satin ribbon


Challenges:
CAS Mix Up November Challenge - Stencil Monoprint
CAS Christmas November Challenge - Christmas Critters


Monday, November 01, 2021

CAS Mix Up November Challenge

Hi everyone.  It's the start of the final challenge for CAS Mix Up for 2021!  This month I'm hosting and I've picked my very favourite stencil technique ...

This is a fairly easy technique.  You pick a stencil (one with some open spaces works best), ink up the stencil (not the paper!).  Spritz your inked stencil with a bit of water and then turn it over onto a piece of card that can handle water (watercolour paper, mixed media, bristol, etc.)  Make sure to have a couple of paper towels handy to mop up any excess ink that squirts out from under the stencil.  The point is to colour the background and keep the image on the stencil clean with no colour.  The challenge is getting the right amount of water.  Not too much, and not too little.  Practice helps! :)

I started the background using a Gear Stencil (AliExpress) and inking it with Bister Powders (brown, blue).  I spritzed, turned over onto a piece of mixed media paper, and blotted with a paper towel.  I ended up with a full A2 card front of my design.  I cut off 1 3/4" to add to my card front (also added a piece to the inside).  I stamped the sentiment (Birthday Blowout - Poppy Stamps) in Gathered Twigs distress ink ... it's a good match for the brown bister on the strip.  I used some gear dies (AliExpress), die-cut from white, heat embossed with Verdigis embossing powder (turquoise), and then added a bit more random embossing with Frantage Aged Copper.  I'm happy how they turned out.

Close-up ...

and inside ...

We are happy to have Steph (My Paper Corner) as our Guest Designer this month.  Welcome Steph!

Please check out the challenge blog to see the Stencil Monoprint cards from our Designers and wonderful Guest Designer, Steph.  Then come play along.  Hope to see you in the gallery!


* * * * *
Every year Alex takes a portrait of Jessie and of Violeta in our front yard, under the red maple tree.
The dogs always enjoy playing in the fallen leaves. :)

Jessie

Violeta (Jessie's cousin)
Photographs by Alejandro Garcia


If you would like to subscribe by email,
please fill out the subscription form in the upper right sidebar.
It is also important to add sw1subscribers@gmail.com to your contact list
so Google recognizes the address and delivers the updates.


Stamps:  Birthday Blowout (Poppy Stamps)
Paper:   Mixed Media (Strathmore 140 lb.); White card base (Neenah 110 lb.)
Ink:   Bister Powders:  Brown, Blue; Gathered Twigs Distress Ink (Tim Holtz); Versamark
Accessories:   Gear Stencil (AliExpress), water mister, gear dies (AliExpress), Verdigris embossing Powder (Ranger); Frantage Aged Copper embossing powder (Stampendous), heat tool

Challenges:
CAS Mix Up November Challenge - Stencil Monoprint