Showing posts with label colouring with markers. Show all posts

Wednesday, January 08, 2020

Thanks

Hi everyone.  Today's card uses a NBUS (never before used schtuff ala Darnell).

I really enjoy the Stampendous stamps and have a lot of them in my stash.  For the card above, I outlined the flowers using a Festive Berries distress ink marker and then stamped onto a piece of mixed media paper.  Repeated using Mowed Lawn marker for the leaves and stems.  I left the stamp and my card front in the Misti.  I then used a water brush to add more colour to the images.

Once I was happy, I repeated the first steps above, using the markers to re-stamp the outline.  I love this fun and easy technique for watercolouring.  I added a simple sentiment and some sequins for a bit of sparkle.

Close-up ...
Hope you are all having a wonderful day.  Thanks for visiting me!

* * * * *
Jessie
Lazy Sunday afternoon
Laying on the top of the couch!


Stamps:  Carnations (Stampendous); Lots of Thanks (Simon Says Stamp)
Paper:  Mixed Media (Strathmore 140 lb.)
Ink:  Distress Ink and Markers:  Festive Berries, Mowed Lawn (Tim Holtz)
Accessories & Tools:  Misti, Waterbrush, clear sequins


Thursday, December 19, 2019

Happy Birthday Cooper!

Hi everyone.  Yesterday was our oldest grandson's 6th birthday.  I had a lot of fun making this card for him.  We were told he is really into puzzles right now, so this card was designed to go with part of his gift, which is a space puzzle.  I think he'll like the card. :)

I created the background with smooshing salty ocean and chipped sapphire distress inks.  I did about three layers to get the depth of colour I wanted.  I then splattered with diluted white acrylic paint for the stars.  I don't have a rocket stamp, so I googled an image, printed, fussy-cut and coloured it with zig markers.  I added crystal drops to the windows for some shine.  The sentiment is heat embossed in white.

Close-up ...


Stamps:  Noteworthy (Stamplorations)
Paper:  Mixed Media (Strathmore 140 lb); White card base (Neenah 110 lb.)
Ink:  Distress Inks:  Salty Ocean, Chipped Sapphire (Tim Holtz); Zigs; Versamark
Accessories & Tools:  water mister, white acrylic paint, paint brush for splattering, white embossing powder, heat tool


Monday, September 23, 2019

Penny Black New Release - Merry and Joy

Hi everyone.  Today I'm sharing three cards all made from the same stamp (poinsettia poem 40-700), which is part of the newest release from Penny Black.  I'll be sharing more cards over the next few months using many of the new, beautiful Christmas images.

For my first card I've heat embossed the image in white.  Used distress inks and dye inks to watercolour the image, adding a wash of soft gray in the background.  The sentiment "NOEL" is from a different stamp set in the new release (all the trimmings 30-618).  I framed the panel with a new frame die set (stitched loops 51-573).

Close-up ...

Second card uses a portion of the image ...
For this card I smooshed blue and green distress inks to create a colourful background.  The same poinsettia poem image was stamped over top and heat embossed in silver.  I used a small paint brush and bleach to remove the colour from the image.  Soft gray dye ink was used to add some definition to the petals and leaves.  A sentiment, "MERRY", which is from another stamp set of the new release (merry builder 30-619), was heat embossed in silver to match the image.  The panel was popped up on foam for added dimension.

Close-up ...

Third card uses just a small portion of the image ...
This time I coloured the stamp with distress markers, adding one colour at a time, stamping, and then using a water brush to move the colour from the outline to fill the image.  It gives a very delicate, light look to the watercolouring.  This has been done expertly by my dear friend Bonnie for years, and I finally gave it a try.  LOVE the look!

Only a portion of the image was die-cut with a circle.  The circle was popped up on foam for added dimension and a small red card stock banner was added with white embossing of the sentiment "Greetings of the Season", which is part of another new stamp set (merry up 30-622).

Close-up ...

I hope you've enjoyed the three different techniques I've used with this gorgeous poinsettia image.

Penny Black Products:
poinsettia poem 40-700
all the trimmings 30-618
stitched loops frame die 51-573
merry builder 30-619
merry up 30-622


Wednesday, October 17, 2018

Cardinals

Hi everyone.  Today I'm sharing a watercoloured card of some cardinals as the reminder card for the CAS Christmas October Challenge - Bird.  I received this beautiful image from my dear friend MaryH, a long time ago.  So happy to finally have inked it up.

Susan is hosting ...

I stamped the image and heat embossed in liquid platinum and then watercoloured with dye ink markers.  I thought it needed some snow, so heat embossed with Shabby White Frantage which has a bit of texture.  I die-cut an oval on my card front and lined up part of the stamp behind.  The sentiment is also heat embossed in liquid platinum.  This image makes for a very elegant card.  I looked up the stamp from the manufacturer after I finished watercolouring and found out that the top bird is a blue jay. :)  Oh well, let's just say it's a different shaped cardinal instead. :)

Here's the close-up ...
Please check out the challenge blog to see the reminder cards from our amazing Designers, and from our wonderful Guest Designer, Sue (Sue's Card Craft).  Then come play along.  Time is ticking down to get all the Christmas cards finished and ready to mail out before the big day!


Stamps:  Cardinals (Northwood Rubber Stamps); Banner Sentiments (Penny Black)
Paper:  Mixed media (Strathmore 140 lb. 400 Series); White card front and base (Neenah 110 lb. card stock)
Ink:  Stampin' Write Markers:  Real Red, Sky Blue, Cherry Cobbler (SU!); Versamark
Accessories & Tools:  Liquid Platinum embossing powder (Ranger), water brush, Shabby White Frantage (Stampendous), Oval Nestabilities (Spellbinder)

Challenges:
CAS Christmas October Challenge - Bird

Sunday, September 16, 2018

Happy Birthday Tree

Hi everyone.  We are already more than half way through September ... where is this year disappearing to??!!

Today I'm sharing a reminder card for the CAS Watercolour September Challenge - Tree, which is being hosted by me. :)


Placed a mixed media card base and tree stamp in the Misti.  Inked up the grass at the bottom of the image using two shades of green markers.  Spritzed with a little water and stamped onto the mixed media card base.  Spritzed again (not adding any more ink) and pressed again over the image.  Used my heat tool to dry before moving to the next colour.

Repeated the process above for the tree branches using two shades of light brown markers, spritzing and stamping.  Repeated another spritz and stamp without re-inking the image.  Added some dark brown ink to the lower trunks, spritzed with water and stamped.  Let dry.  With everything still in the Misti, I cleaned off the stamp and then inked with Versamark, stamped onto the image and then heat embossed in clear.  I was planning on sponging the sky and the heat embossing would protect the image from being effected by the sponging.  But in the end, I left it white.

Stamped sentiment several times to get good coverage and then heat embossed in clear so that it has the shiny finish to match the image.  To finish card, used corner round on top left corner.  I think this makes a great masculine birthday card.

Here's a close-up ...
Would love for you to check out the challenge blog where there is lots of inspiration from newly posted watercoloured tree cards from our amazing Designers, and wonderful Guest Designer, Ros.


Stamps:  snowy village stamp (Penny Black); smile today! stamp (Penny Black)
Paper: Mixed media paper (Strathmore 140 lb.)
Ink:  Stampin' Write markers:  old olive, always artichoke, crumb cake, based brown sugar, early espresso; Versamark
Accessories & Tools: water mister, clear embossing powder, heat tool, corner rounder

Challenges:
CAS Watercolour September Challenge - Tree
CAS Mix Up September Challenge - Ink with Markers


Monday, April 16, 2018

Happy Birthday Wishes

Hi everyone.  It's already more than half way through April.  That means it's time for a reminder post for the CAS Watercolour challenge.

This month Bonnie wants us to add a bird (or birds) to our CAS Watercoloured cards.  I combined two older stamps to create a little water scene with bull rushes and a bird. :)  The stamps were inked with Stampin' Up! markers, spritzed with a little water and then stamped onto mixed media paper.  I used my water brush to move just a little bit of the colour around.  I took one of the markers, scribbled some on my palette, added a little water and then did the wash at the bottom.  The sentiment was stamped in dark brown ink ... same ink used for outlining the bird and bull rushes.  To finish, I rounded the top right corner.  The images were a bit low, so by adding the corner rounding, it makes the card look more balanced.

Here's a close-up ...

Check out the reminder post on the challenge blog to see more inspiring bird cards from our Guest Designer, Stef, our talented Designers, and our fantastic challenge participants.  Then come join us!


Stamps:  Simply Sketched (Stampin' Up!); Be Thankful (Innovative Stamp Creations);
Paper:  Mixed Media paper (Strathmore 140 lb. 400 Series)
Ink:  Markers:  Old Olive, Always Artichoke, Early Espresso, Baked Brown Sugar, Lost Lagoon (Stampin' Up!)
Accessories & Tools:  water mister, water brush, corner rounder (We R Memory Keepers)

Challenges:
CAS Watercolour April Challenge - Bird

Monday, October 16, 2017

Autumn Ferns

Hi everyone.  Today's card is a reminder for the CAS Watercolour October Challenge - Fall Leaves.  And also a reminder that we are celebrating our 1st Birthday this month at CWCC!


Come join us ... there is a prize for the winning card ... and also one prize for a random pick among all entries.


When I think of fall leaves, I automatically visualize shades of yellow, orange and reds.  Not today.  Today's card is all about the fern.  I recently bought this beautiful background fern stamp.  I don't own a lot of background stamps because with my CAS style I thought I wouldn't get a lot of use out of them.  Wrong!  I cut it down to create a small, but colourful panel of watercoloured ferns.  I used my Stampin' Write markers to colour the rubber stamp, spritzed with water and stamped onto mixed media paper, pressing down firmly.  Once the stamp was removed, I used a paper towel to mop up any excess water/ink, which left a beautiful, soft image for the background.  Love it!


I simply added a black die-cut silhouette fern leaf.  I added a very thin frame of black and a black stamped sentiment to tie it all together.

Check out the challenge blog to see the amazing reminder cards made by our design team and wonderful Guest Designer, Marcia.


Stamps:  Plant Background (The Stampin' Place; Sentiment - Bouquet of Thanks (Simon Says Stamp)
Paper:  Mixed Media (Strathmore 140 lb.); White card base (Neenah 110 lb.); Black (SU!)
Ink:  Markers:  Daffodil Delight, Old Olive, Always Artichoke, Bermuda Bay, Island Indigo (SU!)
Accessories & Tools:  water mister, Pair of Ferns die (Cheery Lynn)

Challenges:
CAS Watercolour October Challenge - Fall Leaves

Sunday, April 16, 2017

Watercolour Spritz

Hi everyone.  Just a reminder that we are already over half way through the month. There is just over a week left for the CAS Watercolour April Challenge - Green & Pink.


Watercolour Spritz technique was used for the card above.  I placed my stamp in the misti, coloured with Stampin' Up! markers, spritzed with water and stamped onto watercolour paper.  I reinked the stamp a few times to add more colour ... and used a paint brush to move some of the wet colour around.

A simple stamped sentiment and splattering of green ink finishes the card.

I hope you'll find time to check out the reminder post on the CAS Watercolour challenge blog.  There are more inspirational cards from our wonderful Guest Designer, Marcia ... and the rest of our talented Design Team.

I'm entering this card into a couple of Penny Black challenges, both are "spring" themed this month:


Stamps:  Bejewelled (Penny Black); Sentiment (Cosmos - Technique Tuesday)
Paper:  Watercolour (Arches 140 lb. cold press)
Ink:  Black (Memento); Stampin' Write Markers:  Old Olive, Always Artichoke, Pretty in Pink, Regal Rose, Rose Red (SU!)
Accessories & Tools:  water mister, paint brushes

Challenges:
CAS Watercolour April Challenge - Green & Pink
Penny Black Saturday - Spring
Penny Black & More - Spring

Sunday, October 20, 2013

Happy Birthday, my sweet friend


Hi everyone.  Today I'm sharing a birthday card I made for my sweet friend Frances.  We've known each other for over 20 years and we have spent lots of time over those years crafting together.  In fact, yesterday I hosted a card workshop for Fran and a few of her friends from her Dragon Boat team.  We had lots of fun making Christmas cards ... and we had a birthday cake to celebrate as well.  We have gone out for dinners and lunches several times over those years of friendship ... and occasionally we went for high tea.  Our favorite place is the Secret Garden in Kerrisdale - yummy sandwiches, cakes and tea.  This sweet digi image made me think of the fun times we've had at those high teas ... and I hope it reminds Fran as well.  Happy Birthday Frances!


Here's a close-up of Fran's card:


I stamped the image onto white card stock and colored in with Stampin' Write markers and fussy-cut.  I added dazzling diamonds to the cake "frostings" and crystal effects to the cake plate, two hearts and cherry for some shine.  I popped the cake plate up on a piece of ruby red grid paper.  A simple knot of red ribbon and sentiment finishes the card.


Stamps:  Tea Time (DigiStamp Boutique); Sweet Sentiments (Amy R)
Paper:  White, Ruby Red DSP (SU!)
Ink:  Pretty in pink, Wild Wasabi, Pink Pirouette, So Saffron, Real Red (SU!)
Accessories & Tools:  Dazzling diamonds, crystal effects, 1/4" Real Red grosgrain ribbon, Stamp-a-ma-jig, glue, adhesives and dimensionals


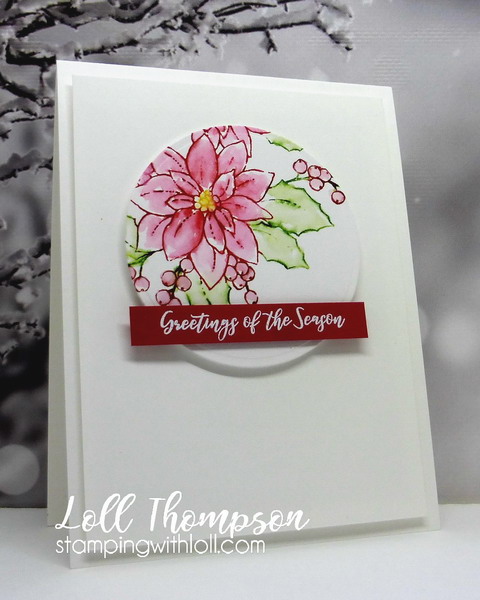
This is one of my favorite layouts right now.  Can't get enough of it. :)


____________________


My wonderful son, Evan ... came by the other day and put up some more shelves for me in my art studio.  He had set up shelves for me over my work desk a few months back and somehow I managed to fill the space and I was again running out of room - wonder how that happened?? :)  Anyways, I now have more storage on the opposite wall ... I'm so happy! :)  Thank you Evan!!  Love you!!


Still have lots of space to add more containers too! :)  This is not typically how my studio looks ... but I did a big clean up and started rearranging things for the new shelves and wanted to get a picture while it still looked clean! :)  I'm now heading to Simon Says to see what I can buy to fill in those blank spots :)


Monday, October 07, 2013

Peace at Christmas


Hi everyone.  It's Monday and time for the next Merry Monday challenge (#78).  Thanks to all that entered last week's challenge - there were so many beautiful cards!!  Today's challenge is to use a bird on your card.


I used a retired set from Stampin' Up! called Gift of Christmas.  I love this image ... it's so beautiful and I thought it went perfectly with my large sentiment stamp.  I added some ribbon this time ... haven't used ribbon for quite a while!


Here's a close-up:


I used my Stampin' Up! markers to ink the stamp, "huffed" (to re-moisten the ink) and stamped onto Whisper White card stock.  I stamped the sentiment, added the ribbon and adhered the panel to a thick white card stock panel the same size to give it more strength.  Then I popped it up on my card base.


Stamps:  Gifts of Christmas (SU!); Peace (Anita's Stamps)
Paper:  White (C.C. Designs); Whisper White (SU!)
Ink:  Real Red, Old Olive, Early Espresso (SU!)
Accessories & Tools:  Old Olive ribbon, Stamp-a-ma-jig, adhesives and dimensionals


I hope you'll join us at Merry Monday for this wonderful challenge.  Pop over to Lesley's blog (Always Playing with Paper) for the details ... and check out the gorgeous cards made by the rest of the Design Team.


Wednesday, August 07, 2013

Daisies for Karen


Hi everyone.  Hope you're not tired of hearing from me :) ... I've had lots of time in the studio lately.  So much fun!!  Today's card is another for this week's Queen for the Day at SCS (QFTD175 - choose a previous Queen with the initials J through L).

Today I'm honoring my good friend, Karen.  She LOVES CAS cards and has been making them for a long time.  I have spent many hours looking over her gallery of cards, oohing and ahhing.  I picked this card to CASE today.  I changed it up a bit, but kept the same basic layout, design and colors.

Thank you Karen ... not only for all the inspiring cards in your gallery and on your blog, but also for your lovely comments and the extra behind-the-scenes work you do for Splitcoast!  Hope you like this card I made in your honor!

Here's a close up of the daisies:


The flowers are stamped in Staz-on Black onto Whisper White card stock and then I colored them with ink and my blender pen (marker layering).  I've added dazzling diamonds to the centers, but couldn't seem to capture the shine in the photo.  I fussy-cut the flower and mounted them onto my yellow polka-dot strip, popping them up with dimensionals for added dimension.  A line of piercing above and below the polka-dot panel adds more detail.


Stamps:  Single Daisy Bloom (Impression Obsession), Sentiment Sampler (Paper Smooches)
Paper:  White (C.C. Designs); Whisper White and Daffodil Delight polka-dot DP (SU!)
Ink:  Staz-on Black, Melon Mambo, Daffodil Delight (SU!)
Accessories & Tools:  blender pen, dazzling diamonds, paper piercing tool, template and mat, adhesive, and dimensionals


Wednesday, July 24, 2013

Topiary


Hi everyone.  I've been battling the flu for the past week so haven't been around visiting blogs.  Starting to feel better and hope to be back surfing the net soon ... I have really missed seeing all my favorite crafters for a couple of weeks now and am eager to see what you've all been up to!

Today I'm organizing a CAS Card Class for mid-August and was going through my cards to pick out three for the class.  I came across a set of Flower Box cards that I made last spring and decided I would update one of them for the class to make (see below).  As I was making a sample card, I thought of changing it up a bit and making the image into a topiary.  I love how it turned out .... and you can see the similarities from my Flower Box card below.  Used the same inks, stamps and die-cut ... yes, that is a Flower Box die-cut from Poppy Stamps.  Once I cut it out, I repositioned it in the same die-cut to cut off the excess and make it into a pot ... so happy with how it turned out.  I sponged around the pot and shaped it a bit to give it a curve - love all the dimension!

Here's a close-up:


Here's where I started ... this is an updated version of a card I made last spring (I changed the card base to white, reduced the layers to make it more CAS and changed up the sentiment.


I am going to stick with the flower box card for the class as the topiary was a bit fiddly (and easy to mess up), so I'll leave that as a one-of :)  Still working on which other two cards I'm going to include.  I had so much fun re-making a previous card, that I may do that some more today. The class will get to try their hand at coloring a stamp with multiple colored markers, second generation stamping, sponging and masking.  Fun and easy techniques ... perfect for a beginner's class.

I think it's going to be a fun day and I look forward to getting back to having friends (and this time family as my cousins are coming to learn) over to share my passion for stamping.

Here's a close-up:


Stamps:  Pocket Silhouettes (SU!); Cause A Scene Master #1 (Kittie Kits - Rubbernecker Stamps); Be Happy Sentiments (Amy R)
Paper:  White (C.C. Designs)
Ink:  Old Olive, Elegant Eggplant, Crumb Cake (SU!)
Accessories & Tools:  Big Shot, Grand Flower Box die (Poppy Stamps), sponge, Stamp-a-ma-jig, post-it note for masking, adhesives, and dimensionals