Saturday, January 28, 2023

Creative Heat Embossed Backgrounds - Group of Seven

Hi everyone.  Today our Zoom group is sharing cards from a recent zoom session on Creative Heat Embossed Backgrounds, which was led by me. :)  


Please check out the link above for technique supplies and instructions, as well as photos of all the cards the group has made with this technique.  There are also links to each member's blog to read how they made their cards using this fun technique!


For the technique, basically heat emboss powders randomly on a piece of card stock to create beautiful and unique backgrounds.  The possibilities are endless as there are so many amazing embossing powders available.

Sharing two ways that worked for me to add versamark ink randomly to card stock.

First, scrunch a piece of cling wrap and dip it in versamark ink, pounce onto scrap paper or paper towel to remove excess ink to avoid blobs of ink.  Then pounce (very lightly) to add ink to the card stock before sprinkling with embossing powders and heat setting.

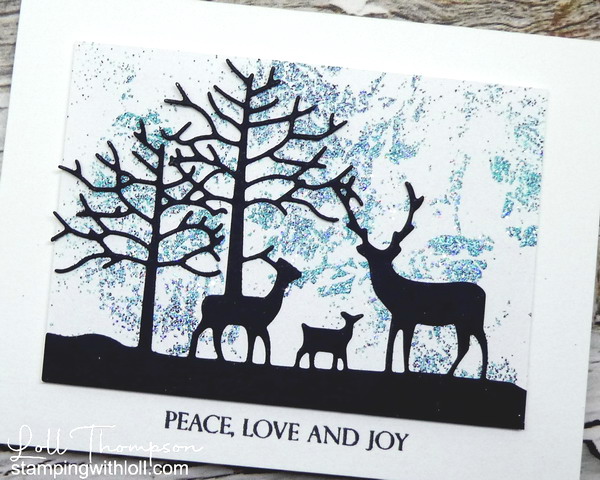
My card above uses three colours of embossing powders for the background: Garden Patina, Black Sparkle, Kaleidoscope (iridescent).  I die-cut a deer/tree image from black card stock and adhered it to the background.  I popped the panel up with foam and stamped a simple sentiment in black ink (Christmas Sentiments - Penny Black).

Close-up ... this really shows the irridescent colours mixed with turquoise and black.
Second, add random heat embossing using a griddle.  I placed a piece of parchment paper down to protect the surface of the griddle, placed card front on top and sprinkled a mix of embossing powders over top.  Turn on the heat to low and wait for the embossing powders to melt (doesn't take long).  Remove the parchment paper and card stock to cool.  Works like a charm.  The powders don't move from where you've placed them. :)

These cards below were made using the griddle to melt Metallic Frantage powders ...
Sending the card above to Just Us Girls #664 - CAS Birthday.  YAY!


Thanks for stopping by!


If you would like to subscribe by email,
please fill out the subscription form in the upper right sidebar.
Make sure to add "subscribe" to the message.
It is also important to add SWL1subscribers@gmail.com to your contact list
so Google recognizes the address and delivers the updates.

To unsubscribe, please use the same form making sure to add
"unsubscribe" to the message.
Thank you.


Card #1:
Stamps:  Christmas Sentiments (Penny Black)
Paper:   White card stock (Neenah 110 lb.); Black card stock (SU!)
Ink:   Versamark Re-inker
Accessories:   Cling Wrap, Embossing Powders:  Garden Patina, Black Sparkle (both from Ranger); and Kaleidoscope (Stampendous - retired), heat tool, Deer and Tree die (AliExpress)

Card #2 & 3:
Stamps:  Birthday Blowout (Poppy Stamps - retired); Happy Messages (Stampendous - retired)
Paper:  White card stock (Neenah 110 lb.); Black card stock (SU!)
Ink:  Versamark (for sentiments)
Accessories:  Metallic Frantage Powders (Stampendous), griddle, Copper embossing powder (Ranger),  Meadow Branch die (Memory Box - retired); Leaf Sprig die (AliExpress), Circle and Oval dies (Spellbinders - retired)

Challenges:


Wednesday, January 25, 2023

Peace, Love and Joy

Hi everyone.  Today I'm sharing a Christmas card done with Stenciling Gesso and then sponging ink over top to create a soft, dreamy background (video by Eileen Godwin).  I have done this technique before ... click HERE or HERE. :)  

I used the beautiful Festive stencil from Tim Holtz, pouncing over top with a finger dauber sponge that had been dipped in a little gesso.  You need so little gesso for this technique.  It acts as a resist and once you sponge over top, the design appears.  I sponged with Salvaged Patina and Mowed Lawn for the background colours.  

The deer (Inspired - Penny Black) is die-cut from black card stock and I used the same to add a frame on two sides of my main panel before popping it up on foam to add dimension.  The sentiment (Christmas Sentiments - Penny Black) is stamped in black ink to finish.

Close-up ...
I'm sending this card over to the Rudolph Days January Challenge - Anything Christmas Goes.

Thanks for stopping by!


If you would like to subscribe by email,
please fill out the subscription form in the upper right sidebar.
Make sure to add "subscribe" to the message.
It is also important to add SWL1subscribers@gmail.com to your contact list
so Google recognizes the address and delivers the updates.

To unsubscribe, please use the same form making sure to add
"unsubscribe" to the message.
Thank you.


Stamps:  Christmas Sentiments (Penny Black)
Paper:   White card stock (Neenah 110 lb.); Black card stock (SU!)
Ink:   Distress Inks:  Salvaged Patina, Mowed Lawn; Black (Memento)
Accessories:   Festive stencil, gesso, finger dauber, sponge brushes, Inspired die (Penny Black)

Challenges:


Friday, January 20, 2023

Together

Hi everyone.

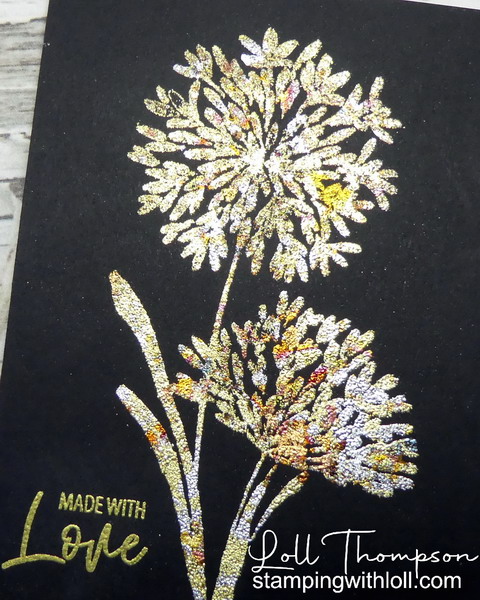
A few days ago, I posted a card using Mica Powder stenciling onto black card.  I set the mica powders using Sticky embossing powder (Ranger) and it worked really well.  Then my friend Susan suggested that the same sticky powder might work with gilding flakes.  I had to give it a try.

It worked so well!  No mess and fussing with glue.  I added Versamark to my image (Together - Penny Black), stamped onto black card stock, sprinkled Sticky powder over top and then heat set.  I pressed some gilding flakes into the image and burnished using Rub-it Scrub-it pad (Ranger).  I briefly reheated to set everything.

I used Cosmos Gilding Flakes - Persian Dawn.  The sentiment (Smiles - Penny Black) is heat embossed with Princess Gold embossing powder to finished the card.

Close-up ...

Thanks for stopping by!


If you would like to subscribe by email,
please fill out the subscription form in the upper right sidebar.
Make sure to add "subscribe" to the message.
It is also important to add SWL1subscribers@gmail.com to your contact list
so Google recognizes the address and delivers the updates.

To unsubscribe, please use the same form making sure to add
"unsubscribe" to the message.
Thank you.


Stamps:  Together, Smiles (both Penny Black)
Paper:   White card stock (Neenah 110 lb.); Black card stock (SU!)
Ink:   Versamark
Accessories:   Sticky Powder (Ranger), heat tool; Persian Dawn gilding flakes (Cosmos), Rub-it Scrub-it Pad (Ranger), Princess Gold embossing powder

Challenges:

Sunday, January 15, 2023

Mica Powders on Black

Hi everyone.  Today I'm sharing a card I made using Sticky powder to adhere mica powders through a stencil onto black card stock.

I'm really happy with how this turned out, but taking a good photo has been hard.  The colours are more subtle than this, and the flowers are a mix of blue and purple ... oh well. :)

Sending the above card to Stencil Fun January Challenge.

And also to Seize the Birthday Challenge #253 ... no topping today. :)

Thanks for stopping by!


If you would like to subscribe by email,
please fill out the subscription form in the upper right sidebar.
Make sure to add "subscribe" to the message.
It is also important to add SWL1subscribers@gmail.com to your contact list
so Google recognizes the address and delivers the updates.

To unsubscribe, please use the same form making sure to add
"unsubscribe" to the message.
Thank you.


Stamps:  Cosmos (Technique Tuesday - retired)
Paper:   White card base (Neenah 110 lb.); Black card stock (SU!)
Ink:   Versamark
Accessories:  Fading Florals Stencil (Simon Says Stamp); Sticky powder (Ranger); heat tool; Pearl-Ex Mica Powders (spring green, interference violet, turquoise), powder brush, white embossing powder, white acrylic paint pen (Posca)
Challenges: